Overview
Form Opening & Closure settings allow you to manage the availability of your form and control how it appears when it’s not accepting responses.
Whether you're running a limited-time campaign, event registration, job application window, or seasonal survey, these controls help you:
Automatically open and close your form
Display clear messages before launch
Show custom closure messages after deadline
Maintain a professional and organized experience
These settings are available inside the Access & Availability tab in Form Settings.
How to Access Form Opening & Closure Settings
Open your form in the builder.
Click the Settings icon in the top toolbar.
Go to Access & Availability.
Enable and configure the options you need.
Click Save.

Schedule When Your Form Opens
Set Submission Start Date
Turn this option ON to choose when your form should start accepting responses.
When enabled, you can configure:
Time Zone
Date
Time
Before the selected start date, respondents will not be able to submit the form.
This is useful for:
Event registrations launching on a specific date
Product launches
Scholarship or job application windows
Early access campaigns
You don’t need to manually open the form — it activates automatically at the scheduled time.
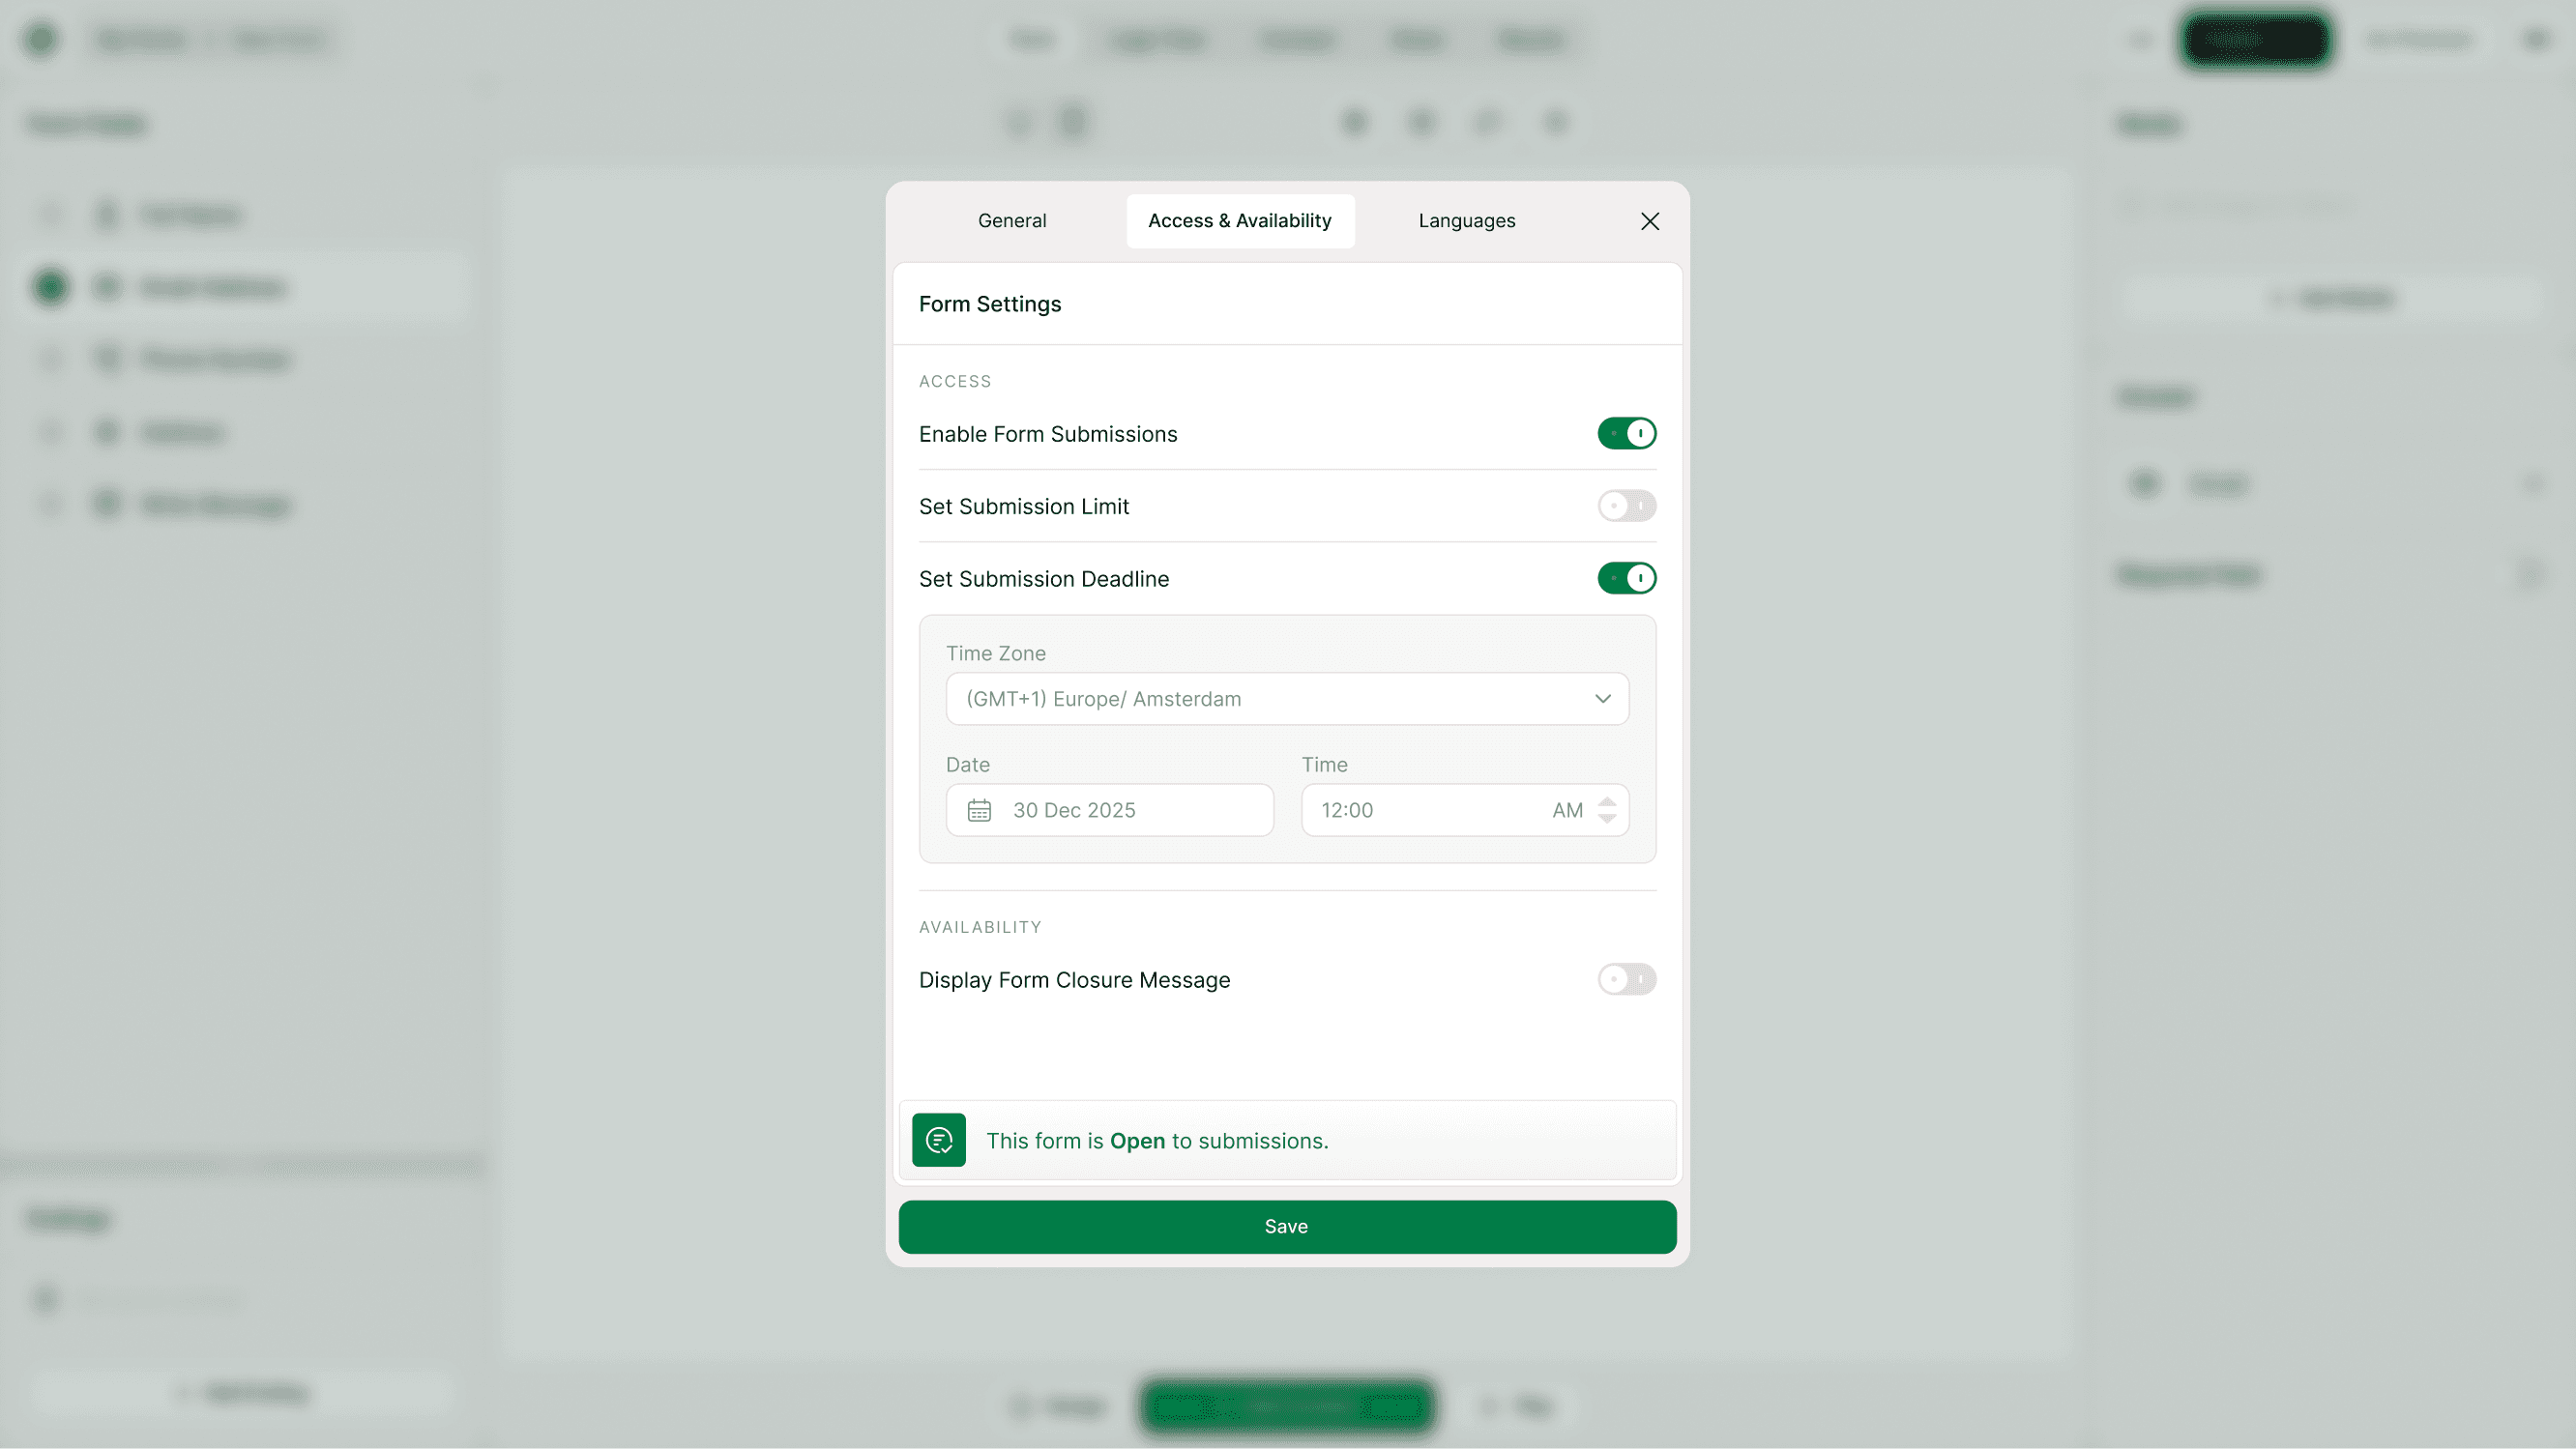
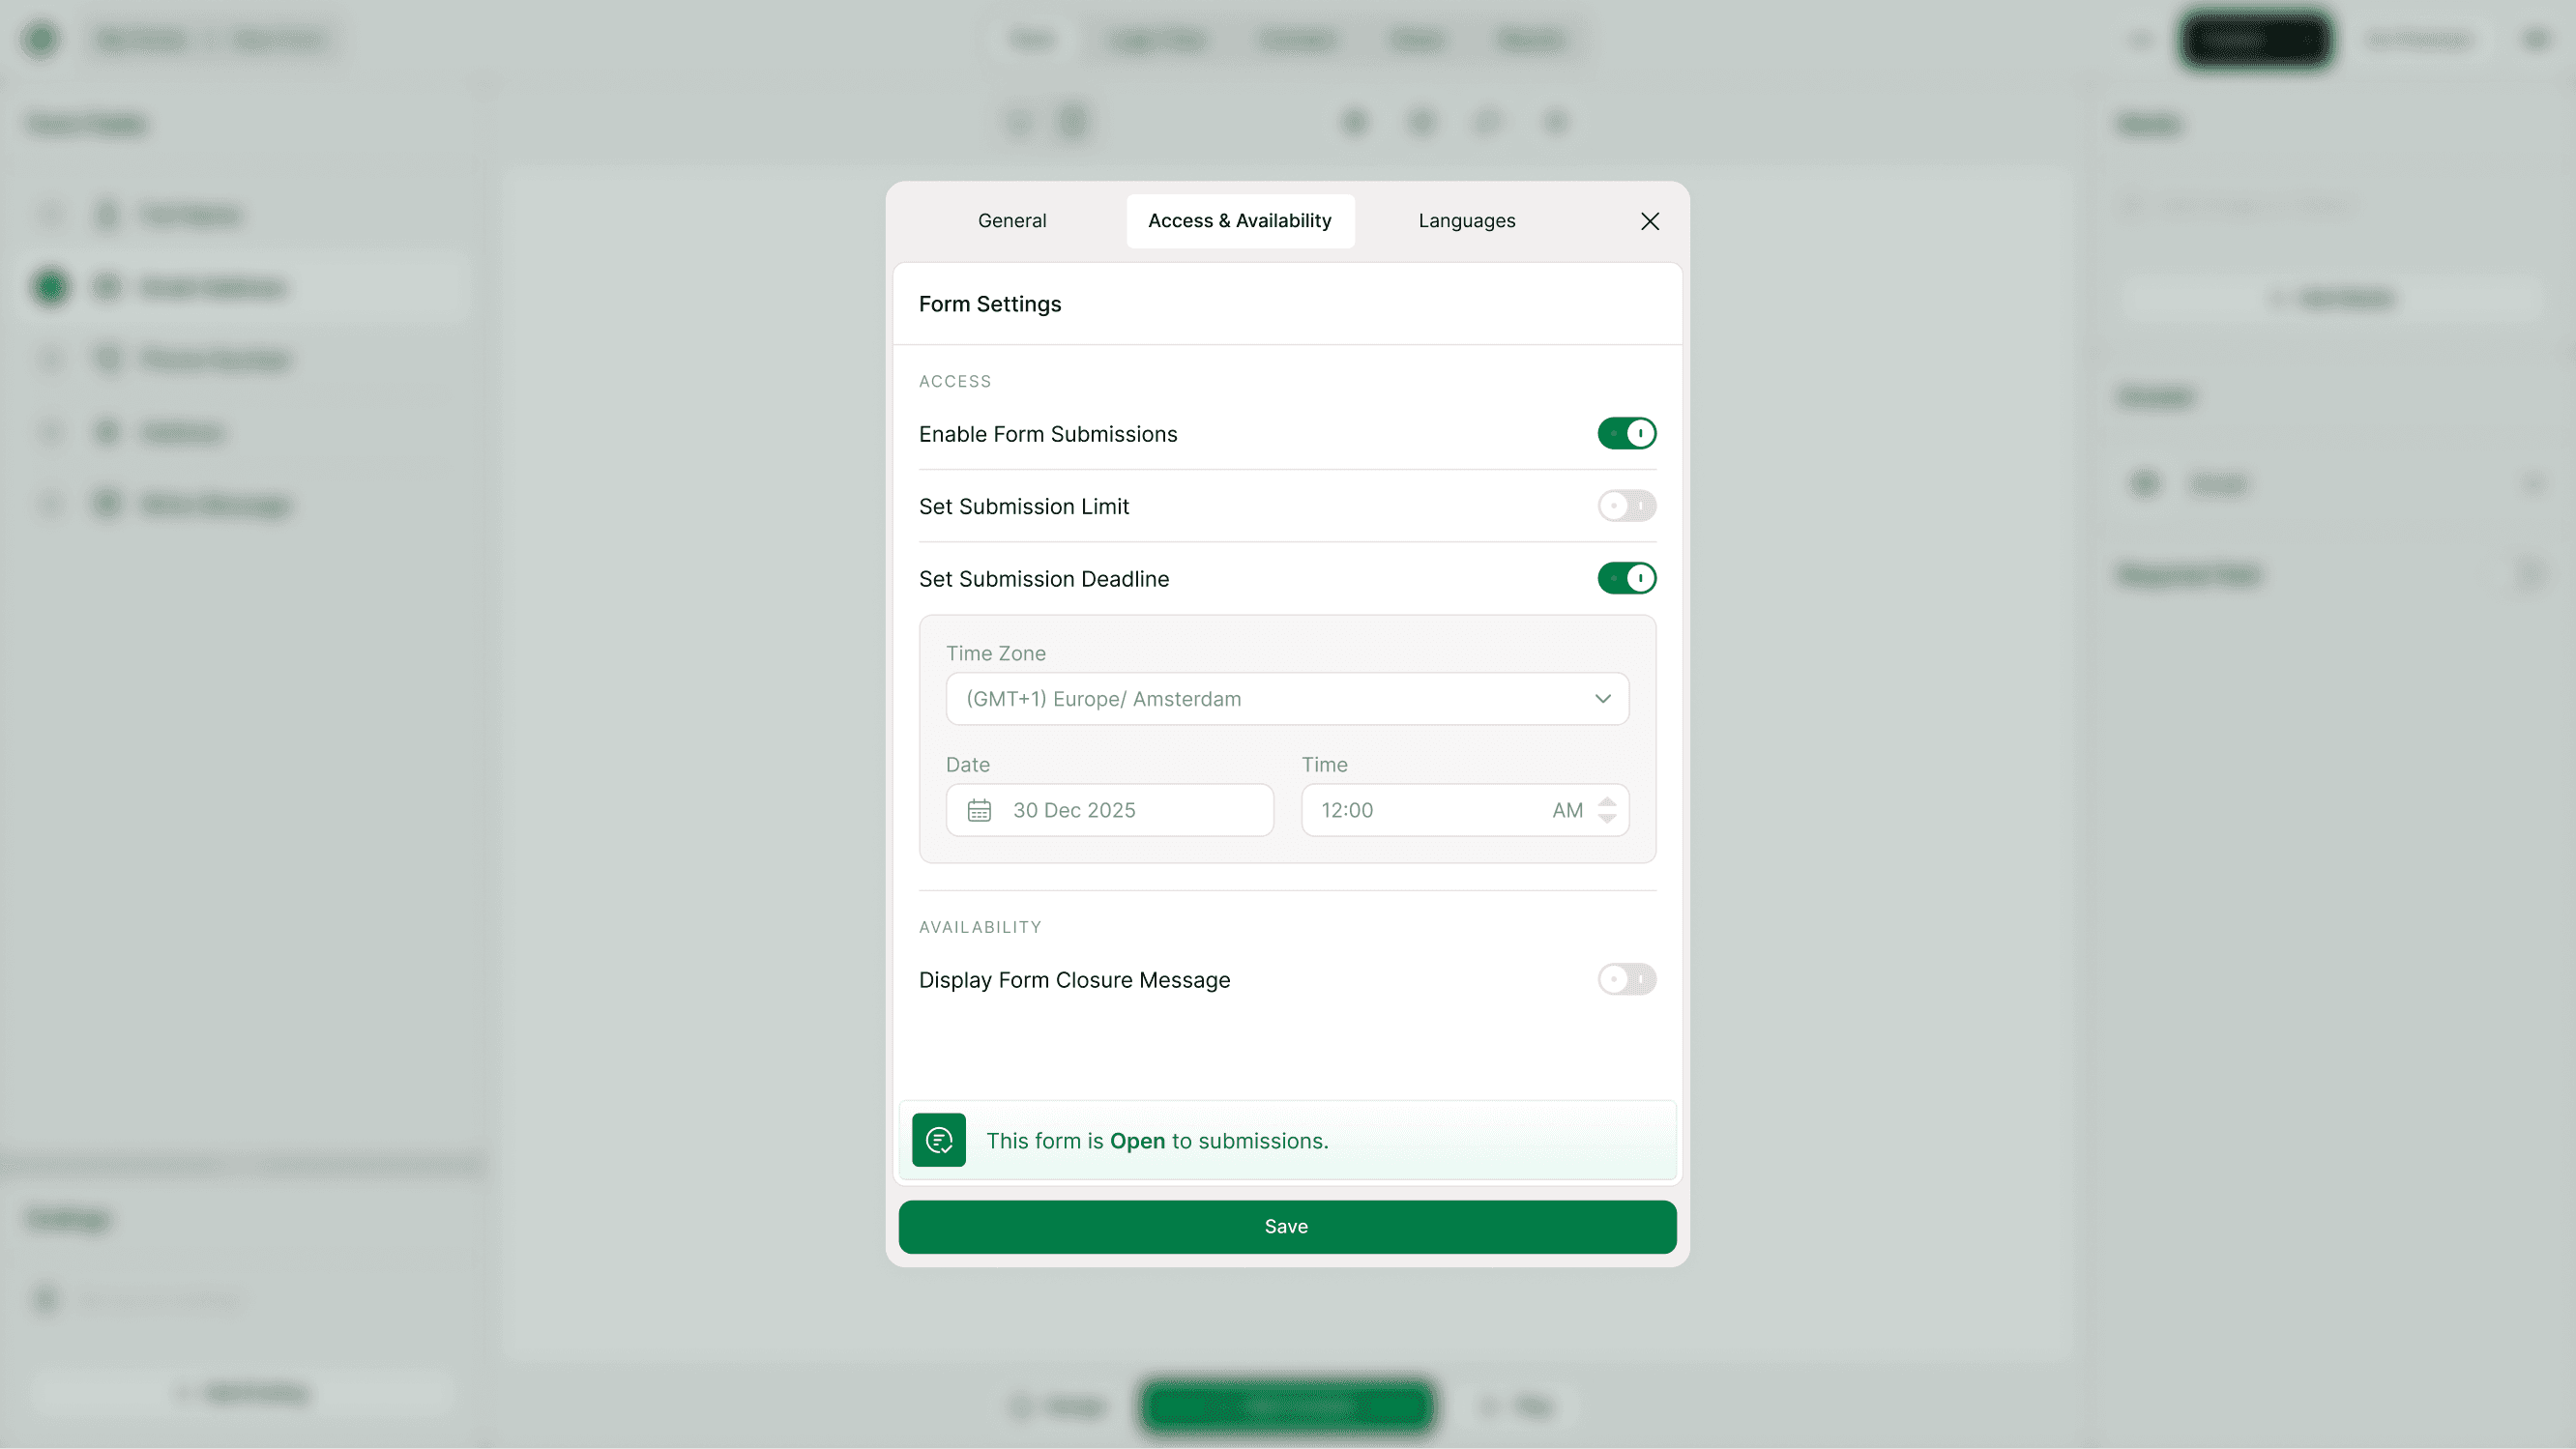
Schedule When Your Form Closes
Set Submission Deadline
Enable this option to automatically stop accepting submissions at a specific date and time.
You can configure:
Time Zone
Date
Time
After the deadline:
The form will stop accepting responses
The closure message (if enabled) will be shown
This prevents late submissions and ensures fair deadlines.
Common use cases:
Contest entries
Event registrations
Application deadlines
Limited surveys
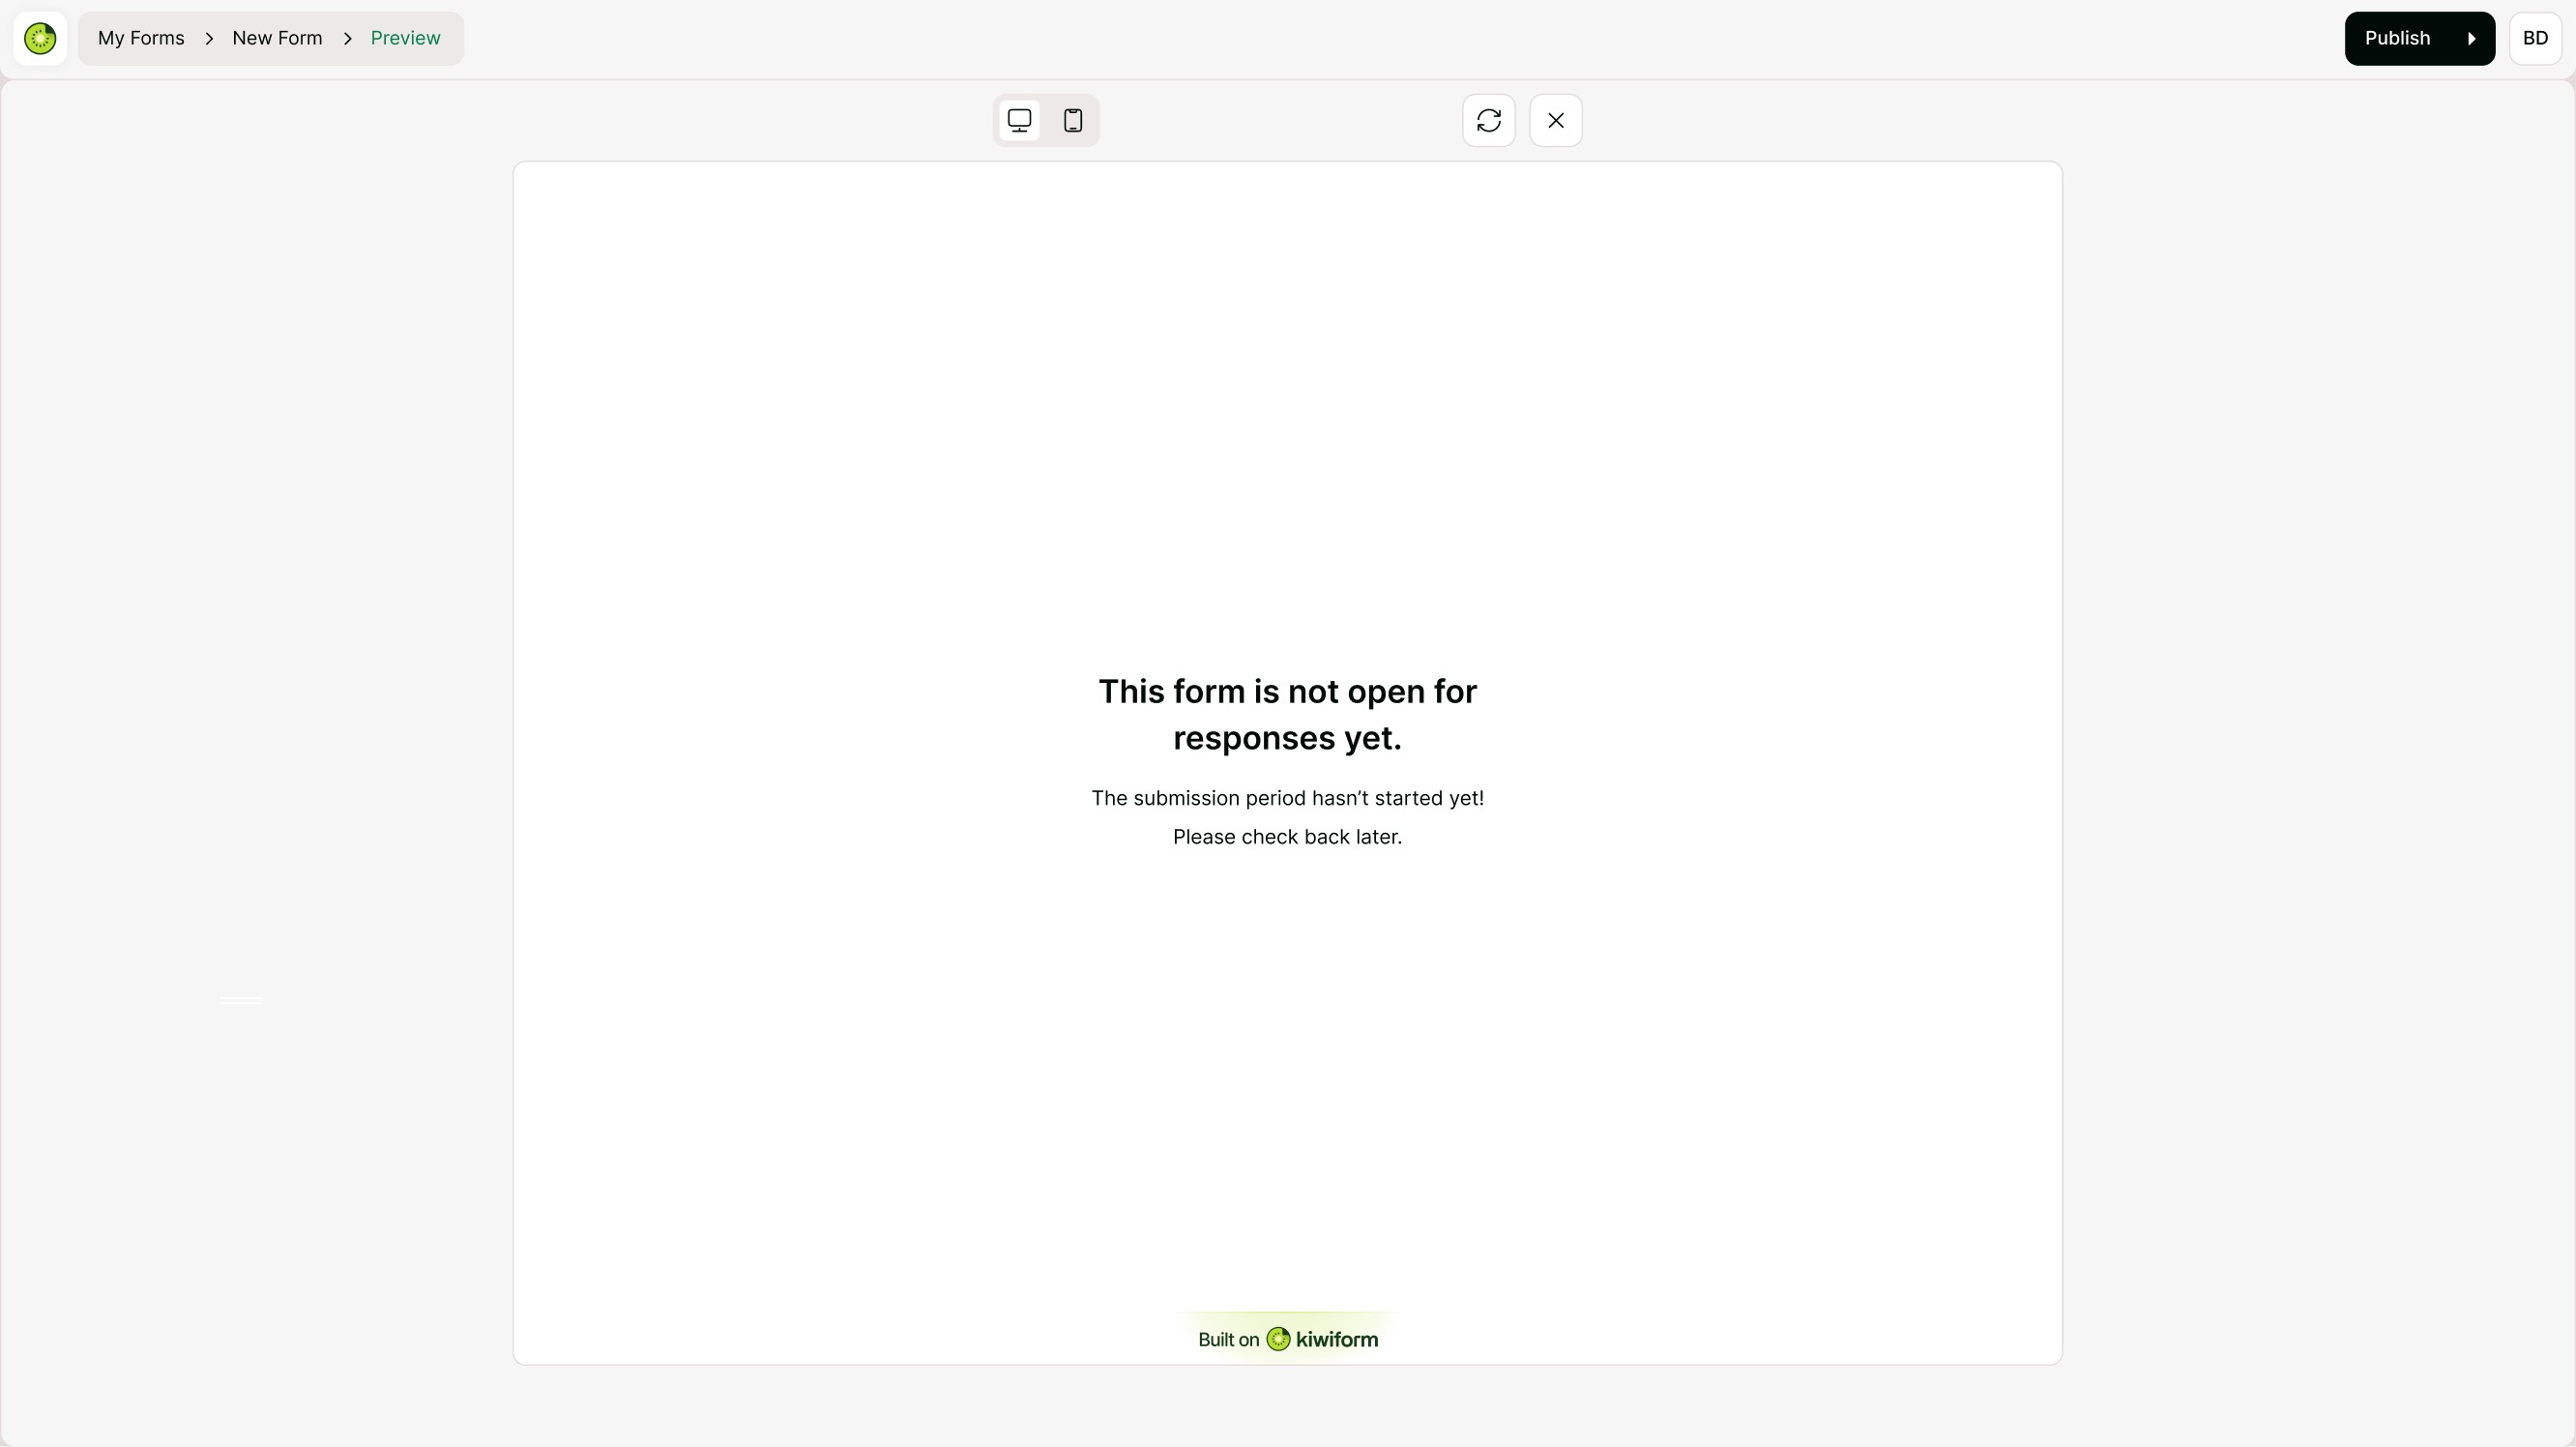
Customize the Opening Message
Display Form Opening Message
When your form has a future start date, you can show a custom message to respondents.
When enabled, you can customize:
Opening Title
Opening Message
Background Image (optional)
This message appears before the form opens.
Example:
Title: “This form is not open for responses yet.”
Message: “The submission period hasn’t started yet. Please check back later.”
This ensures users understand why they cannot submit yet.
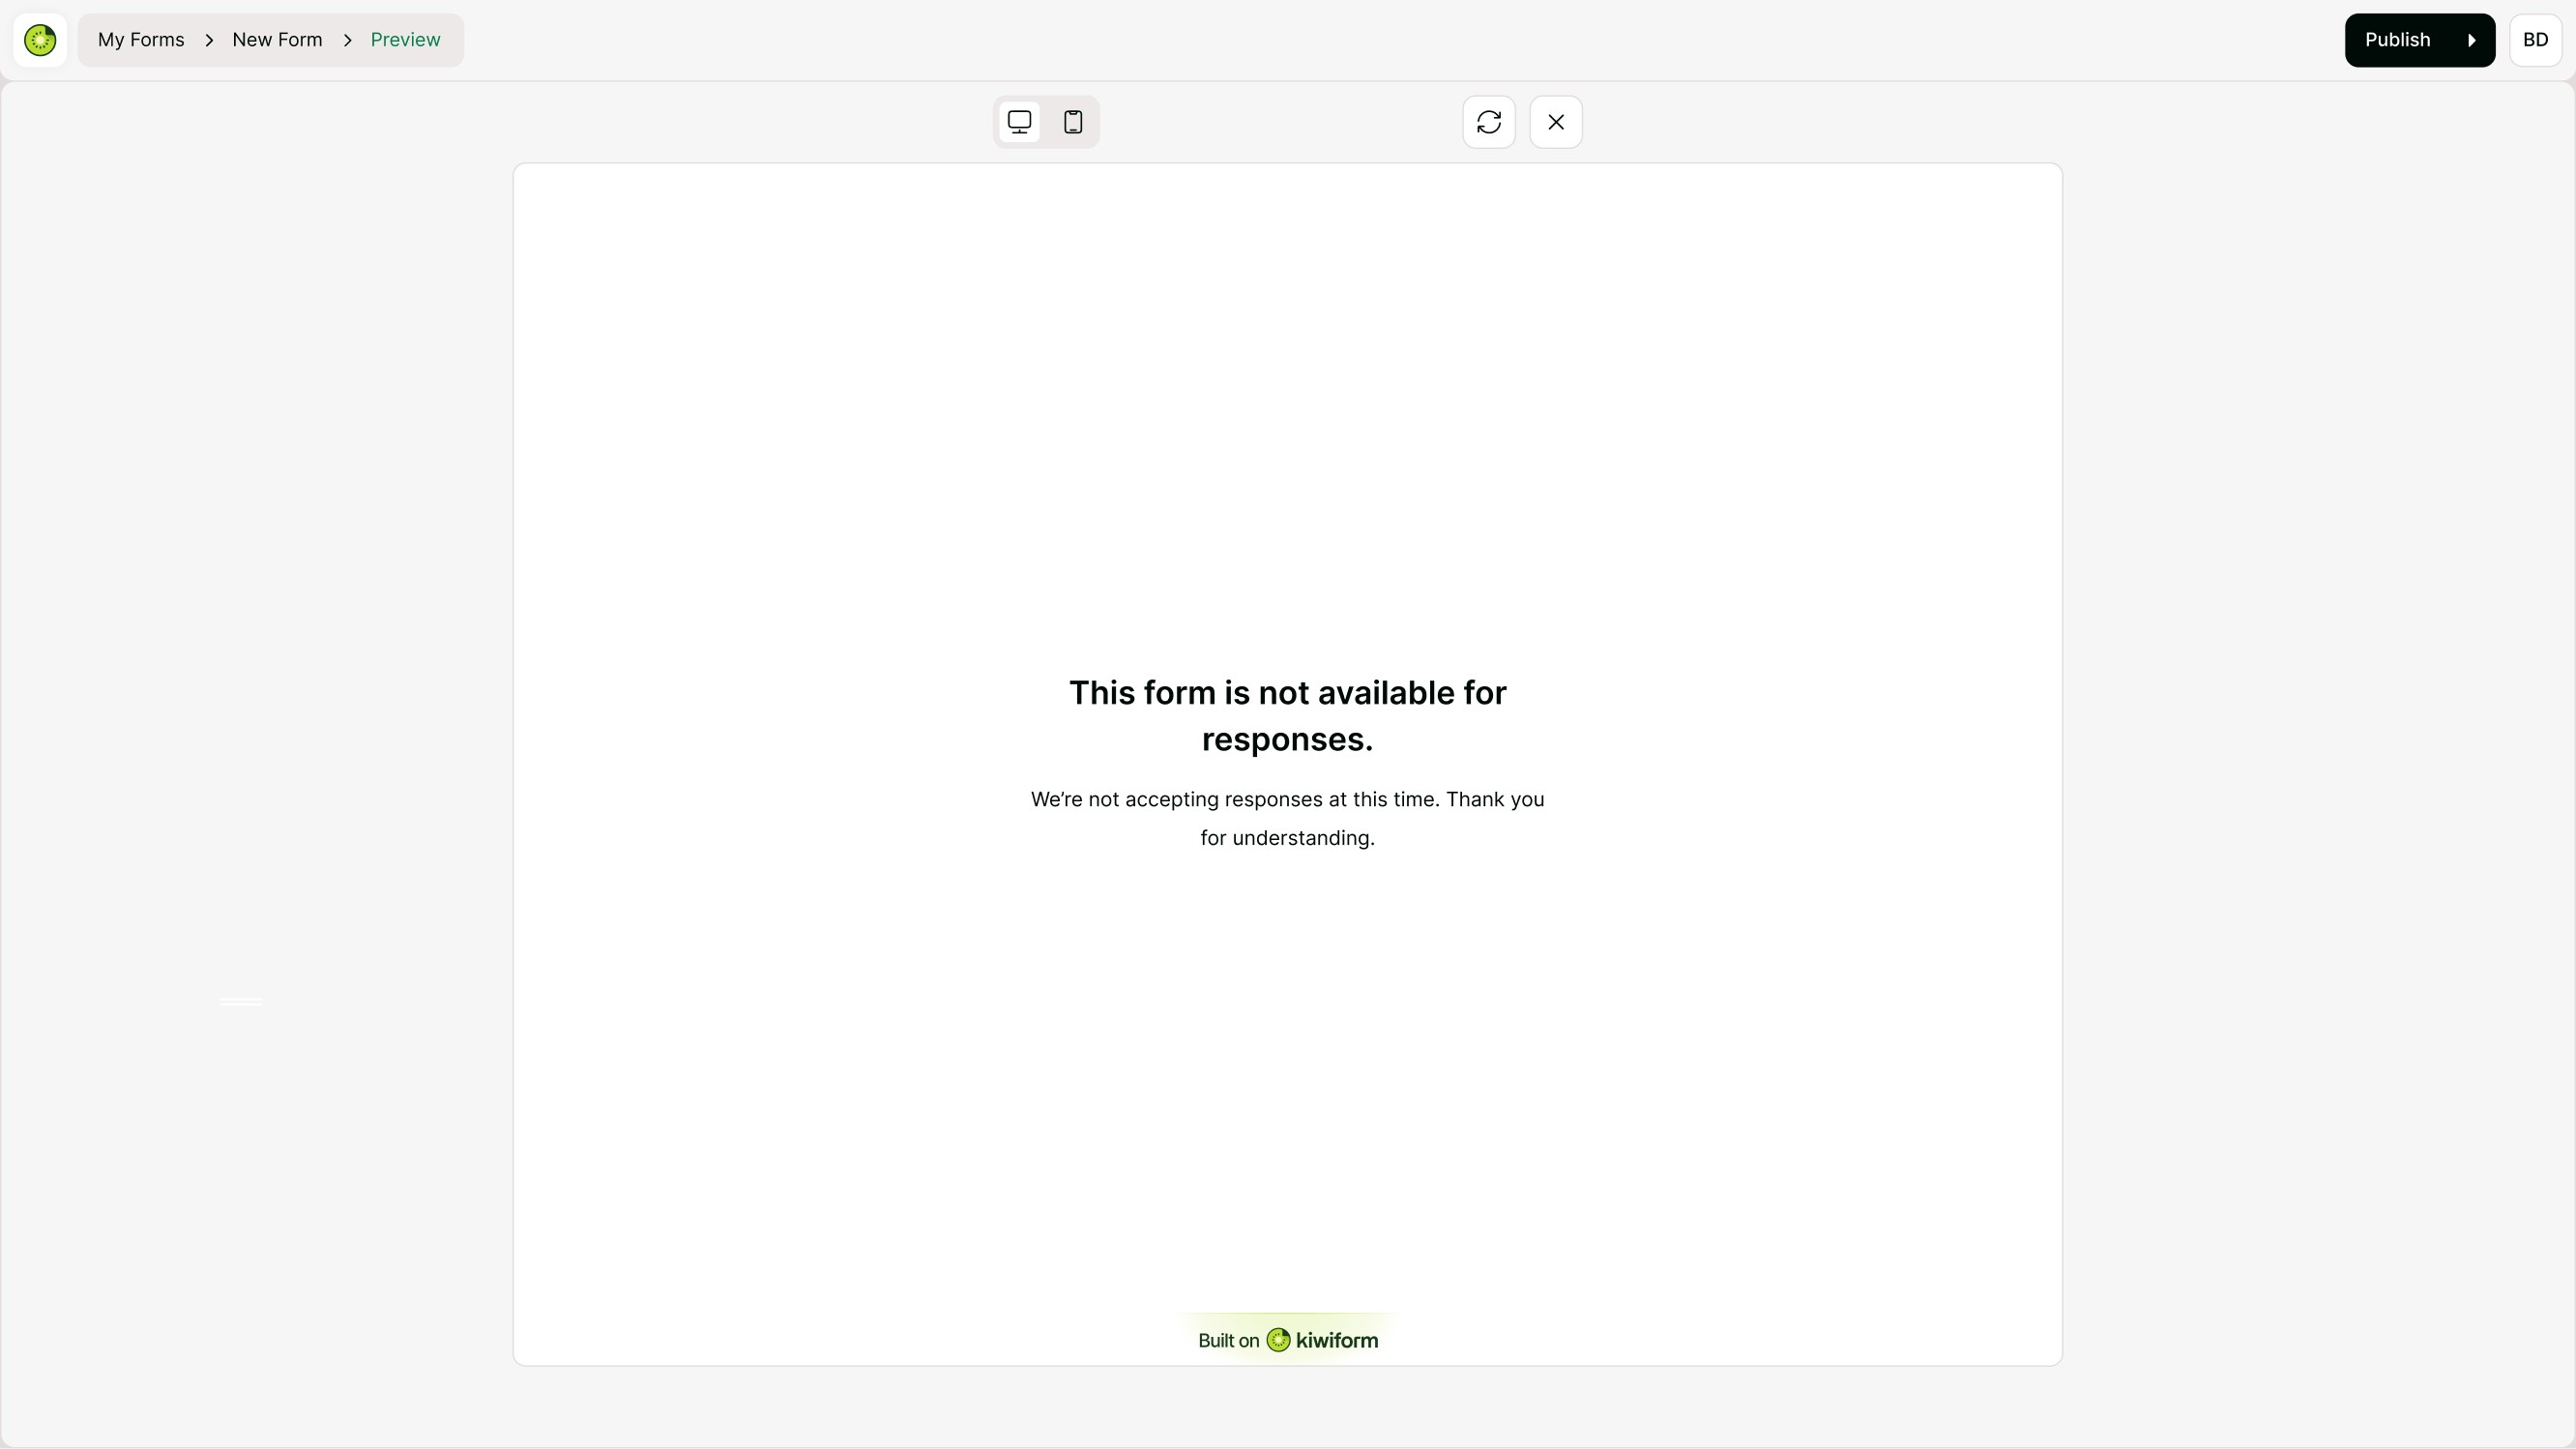
Customize the Closure Message
Display Form Closure Message
When your form is closed (either manually or after deadline), you can show a customized closure screen.
You can configure:
Closure Title
Closure Message
Background Image (optional)
This message appears when:
Submissions are disabled
Submission limit is reached
Deadline has passed
This ensures users understand why they cannot submit yet.
Example:
Title: “This form is not available for responses.”
Message: “We’re not accepting responses at this time. Thank you for understanding.”
This improves clarity and avoids confusion.
What Respondents See
Depending on your settings, respondents may see:
A message that submissions haven’t started yet
A message that submissions are closed
A scheduled opening notice
A deadline-based closure notice
Clear communication builds trust and improves user experience.
When Should You Use These Settings?
Use Form Opening & Closure settings when:
Running limited-time campaigns
Collecting applications with strict deadlines
Managing event registrations
Temporarily pausing submissions
Launching forms on a specific date
These settings help automate availability and reduce manual monitoring.
Related Settings
For full availability control, you may also want to review:
Enable Form Submissions
Set Submission Limit
Prevent Duplicate Submissions
Together, these controls give you complete command over response collection.
Best Practices
Always set the correct time zone when scheduling.
Enable opening message if your form has a future start date.
Enable closure message for better communication after deadline.
Test your form in preview mode before publishing.
Double-check the form status before sharing links.
Summary
Form Opening & Closure features allow you to schedule availability, manage deadlines, and display clear messages when your form is not accepting responses. By combining automated scheduling with customized messaging, you ensure respondents always understand your form’s status.