What the Payment field does
The Payment field allows you to charge respondents during form submission. Instead of redirecting users to an external checkout page, the payment interface appears inside the form itself. This reduces drop-offs, improves completion rates, and creates a more trustworthy experience for respondents.
You can use it for:
Event registrations and ticketing
Course or workshop payments
Consultation or booking deposits
Product or digital download sales
Membership or subscription onboarding
Application fees or service charges
Add a Payment field to your form
To start collecting payments, add the Payment field while building your form.
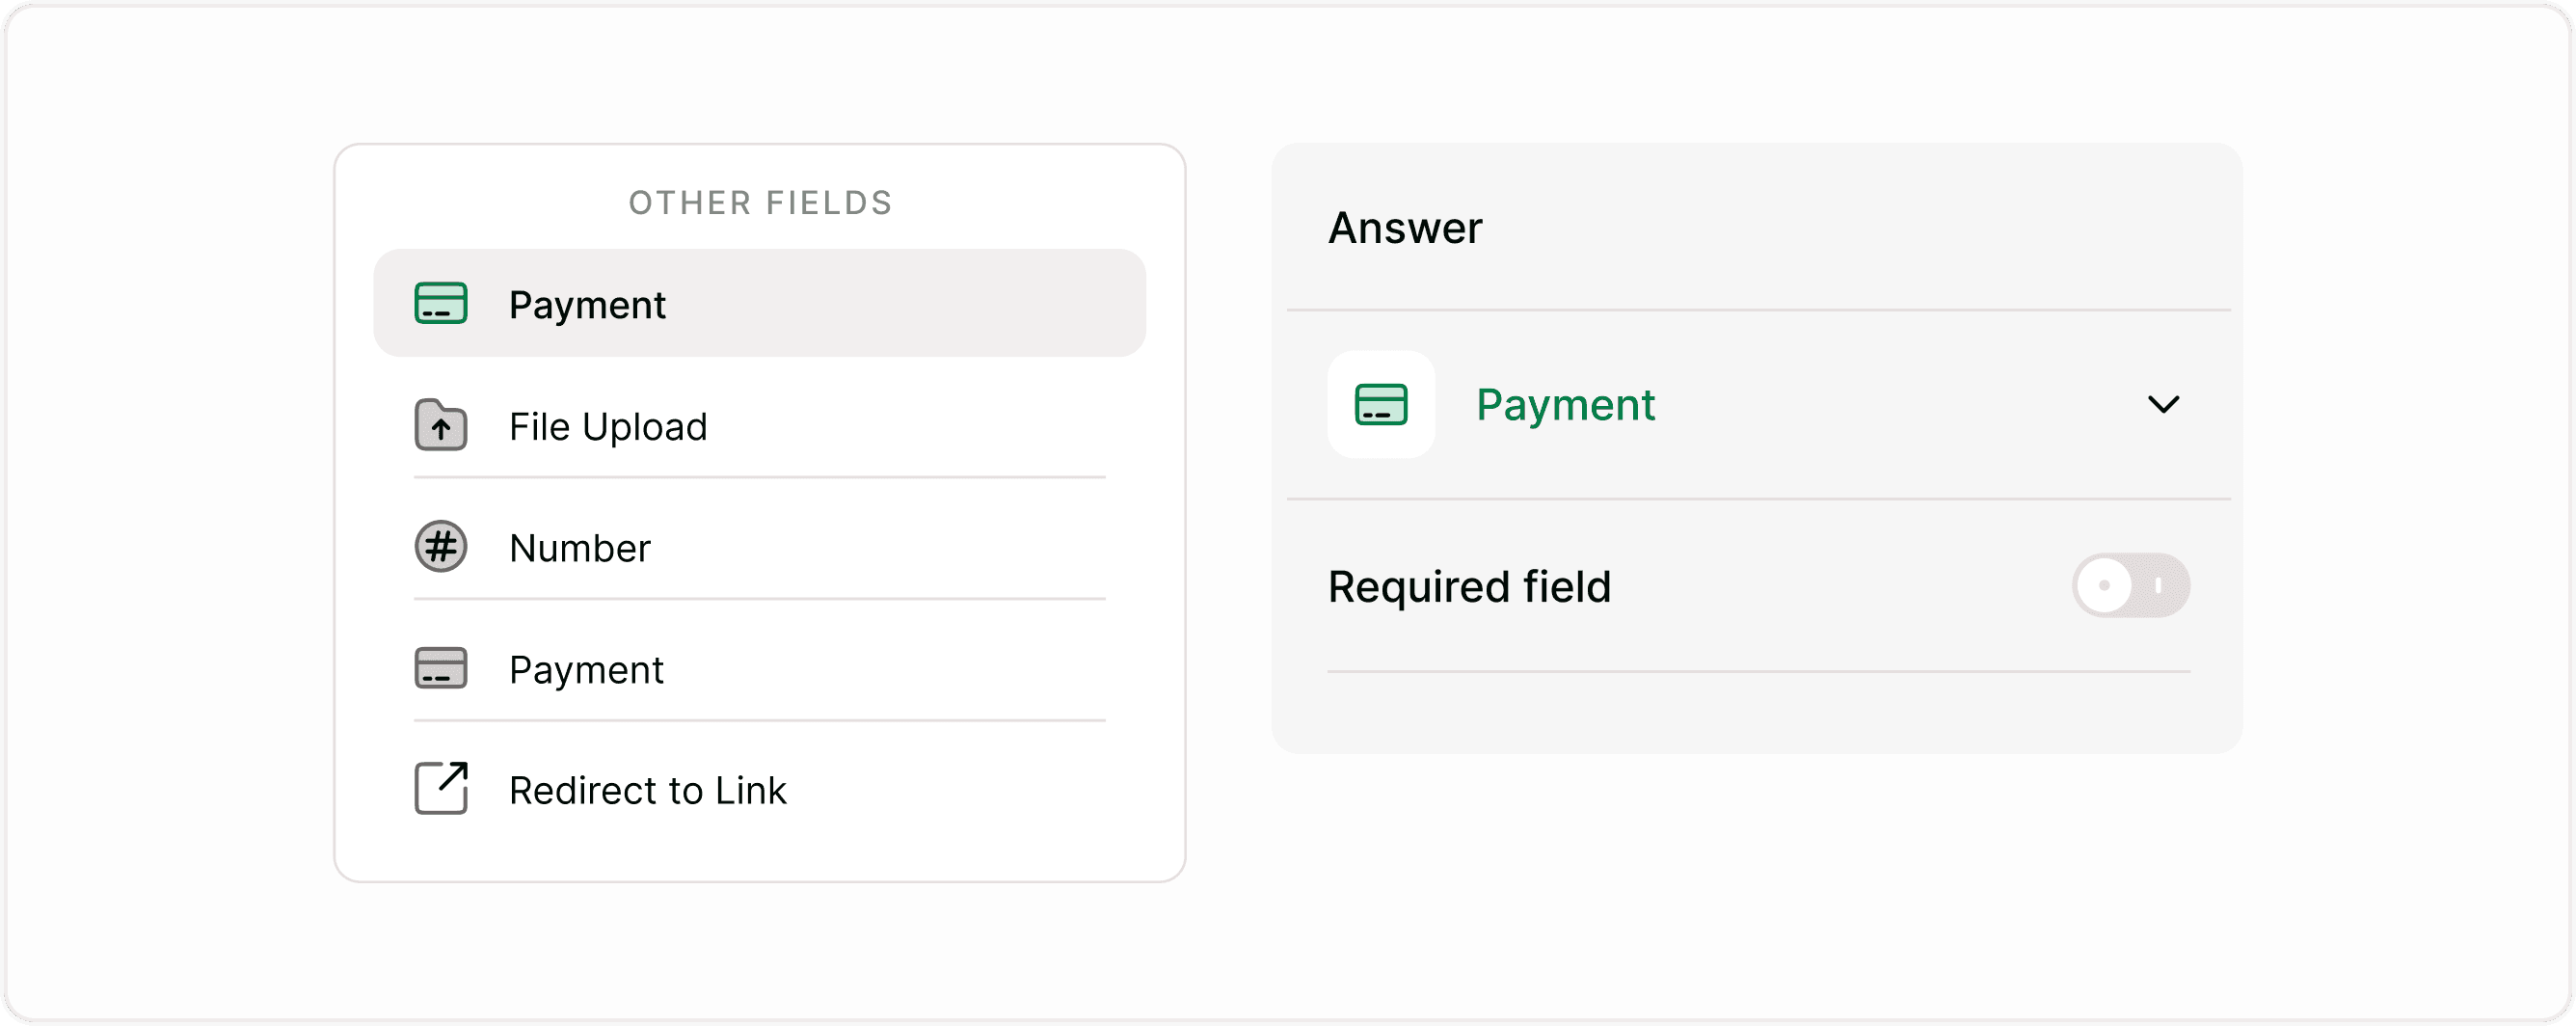
Open your form in the builder
Click Add Content
Choose Payment from the form fields list
Select the field to open its settings in the Answer panel
Once added, you will configure Stripe and payment options from the right-side Answer panel.
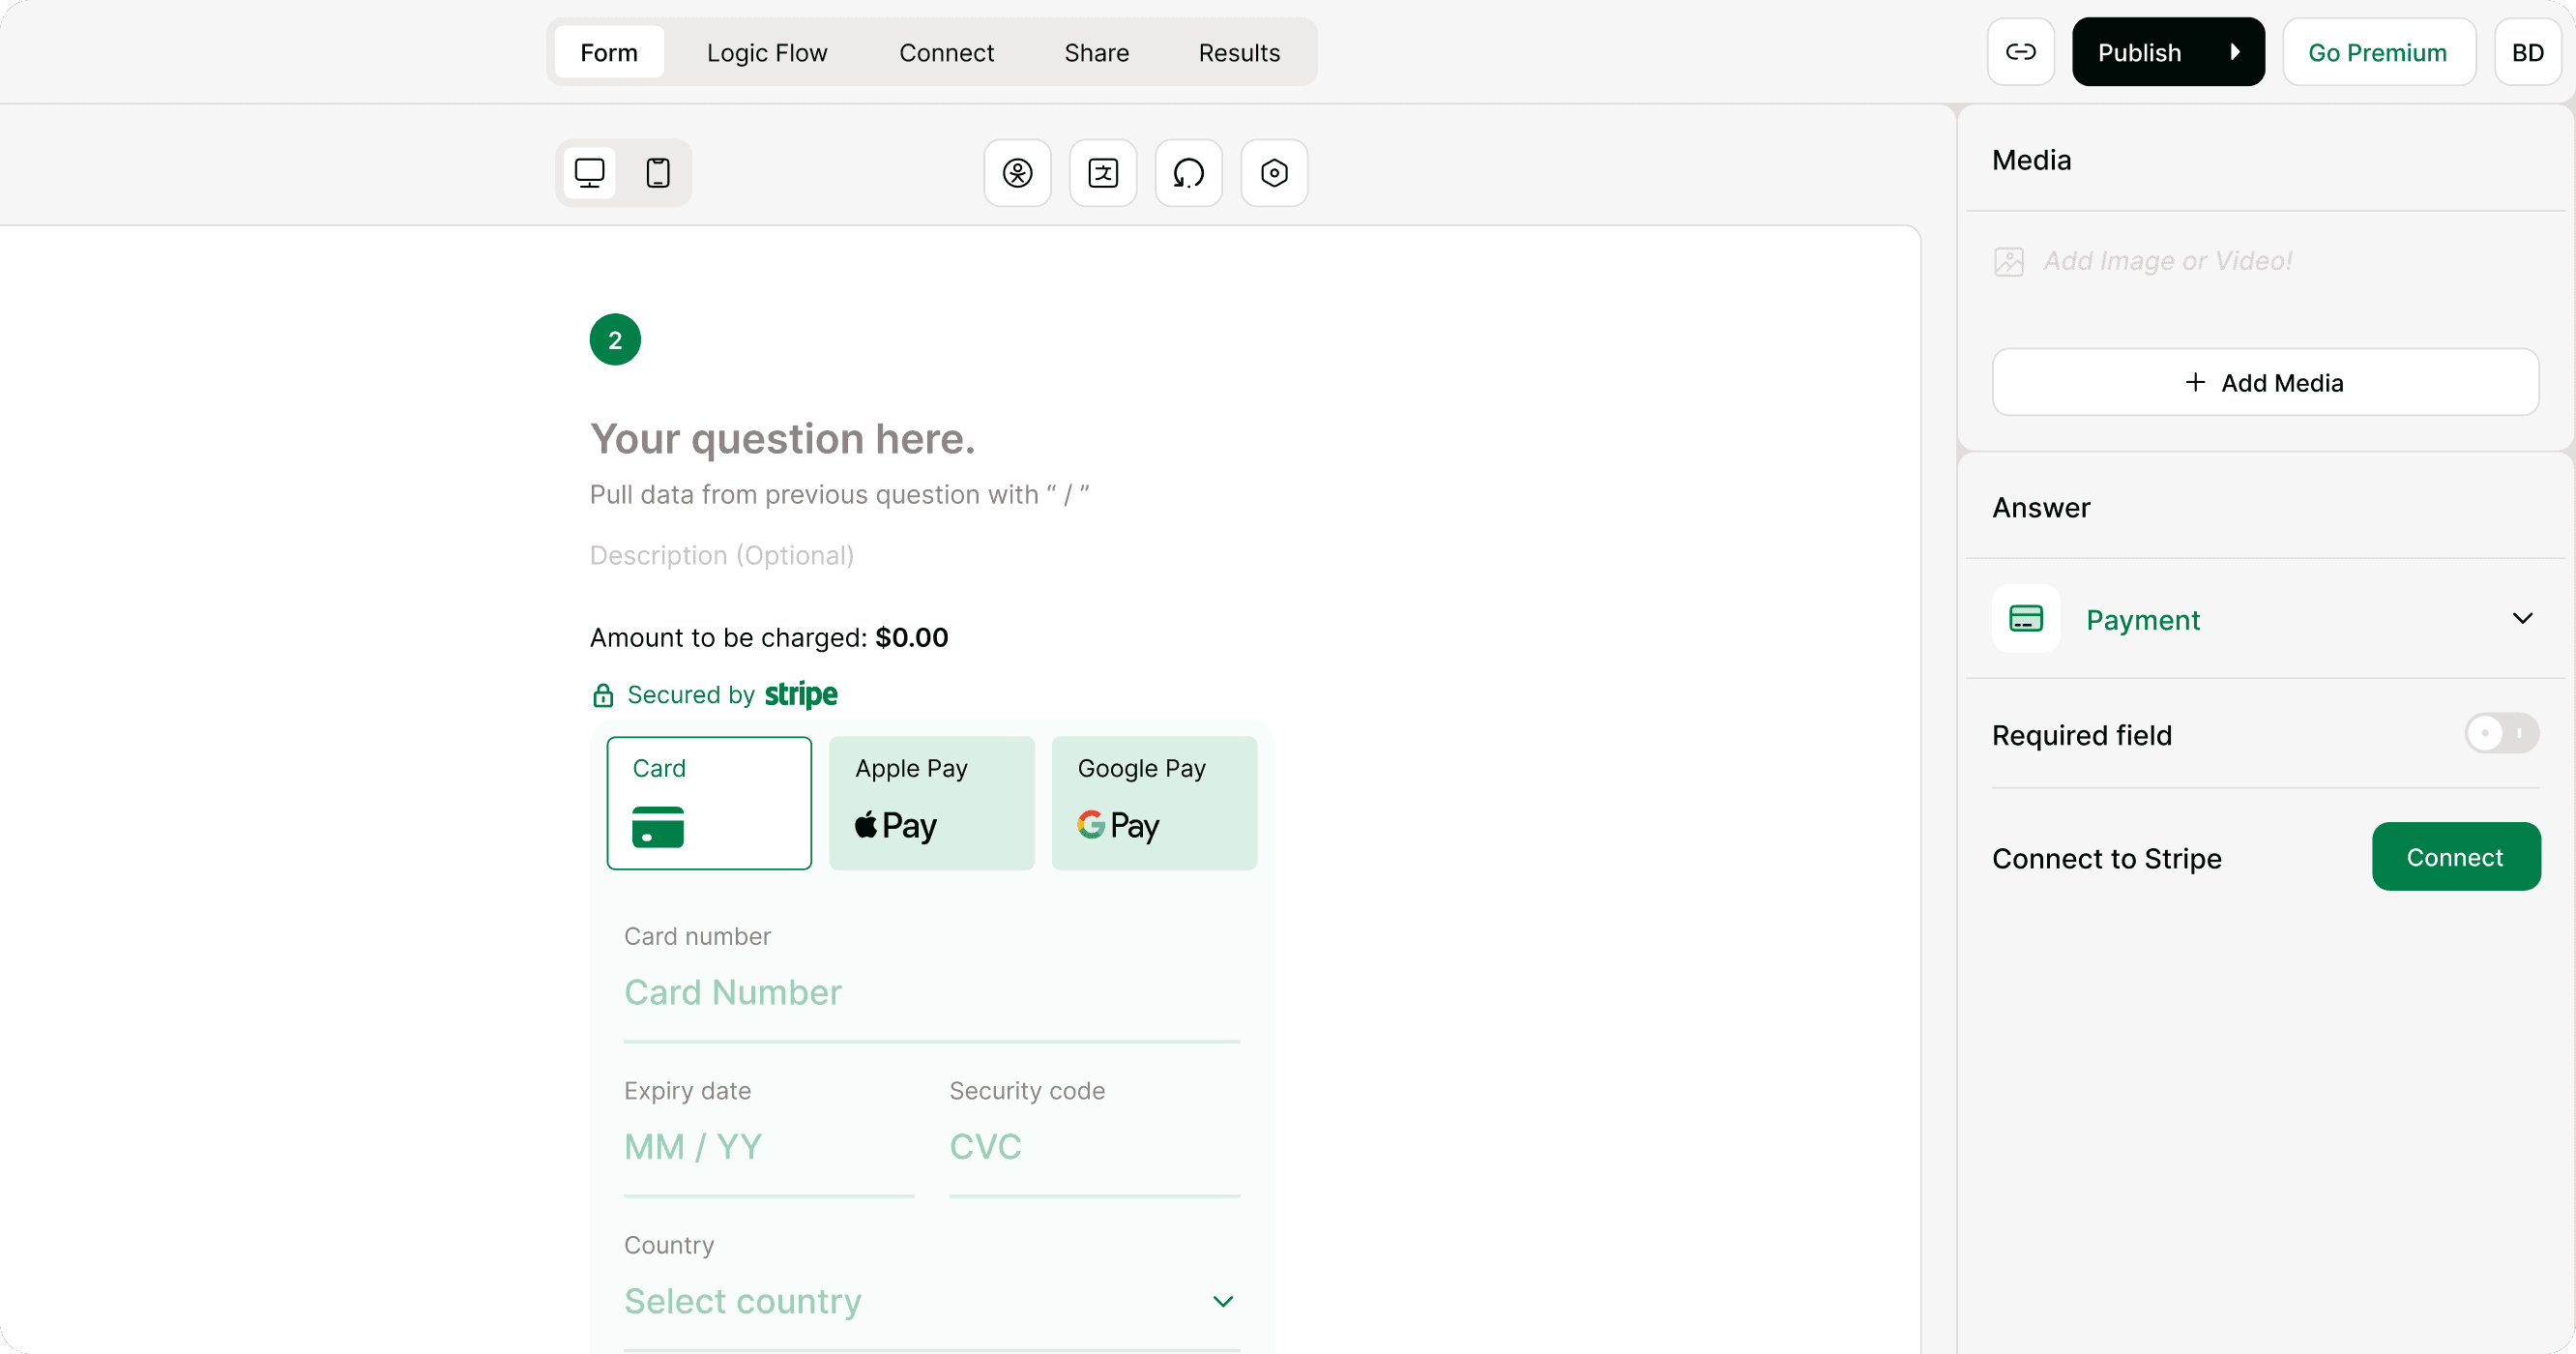
Connect Stripe
Payments in Kiwiform are powered by Stripe. You must connect a Stripe account before collecting payments.
How to connect:
Select the Payment field
In the Answer panel, find Connect to Stripe
Click Connect
Choose or connect your Stripe account
Authorize access
Once connected, the account will appear in the dropdown. You can switch accounts if needed.
Configure payment settings
Set currency and amount
You can define how much respondents will be charged and in which currency.
Choose a currency from the dropdown
Enter the amount to be charged
Ensure the amount reflects your product, service, or fee
The configured amount appears directly in the payment interface shown to respondents.
Suggested image: Currency and amount fields in Answer panel
The configured amount appears directly in the payment interface shown to respondents.
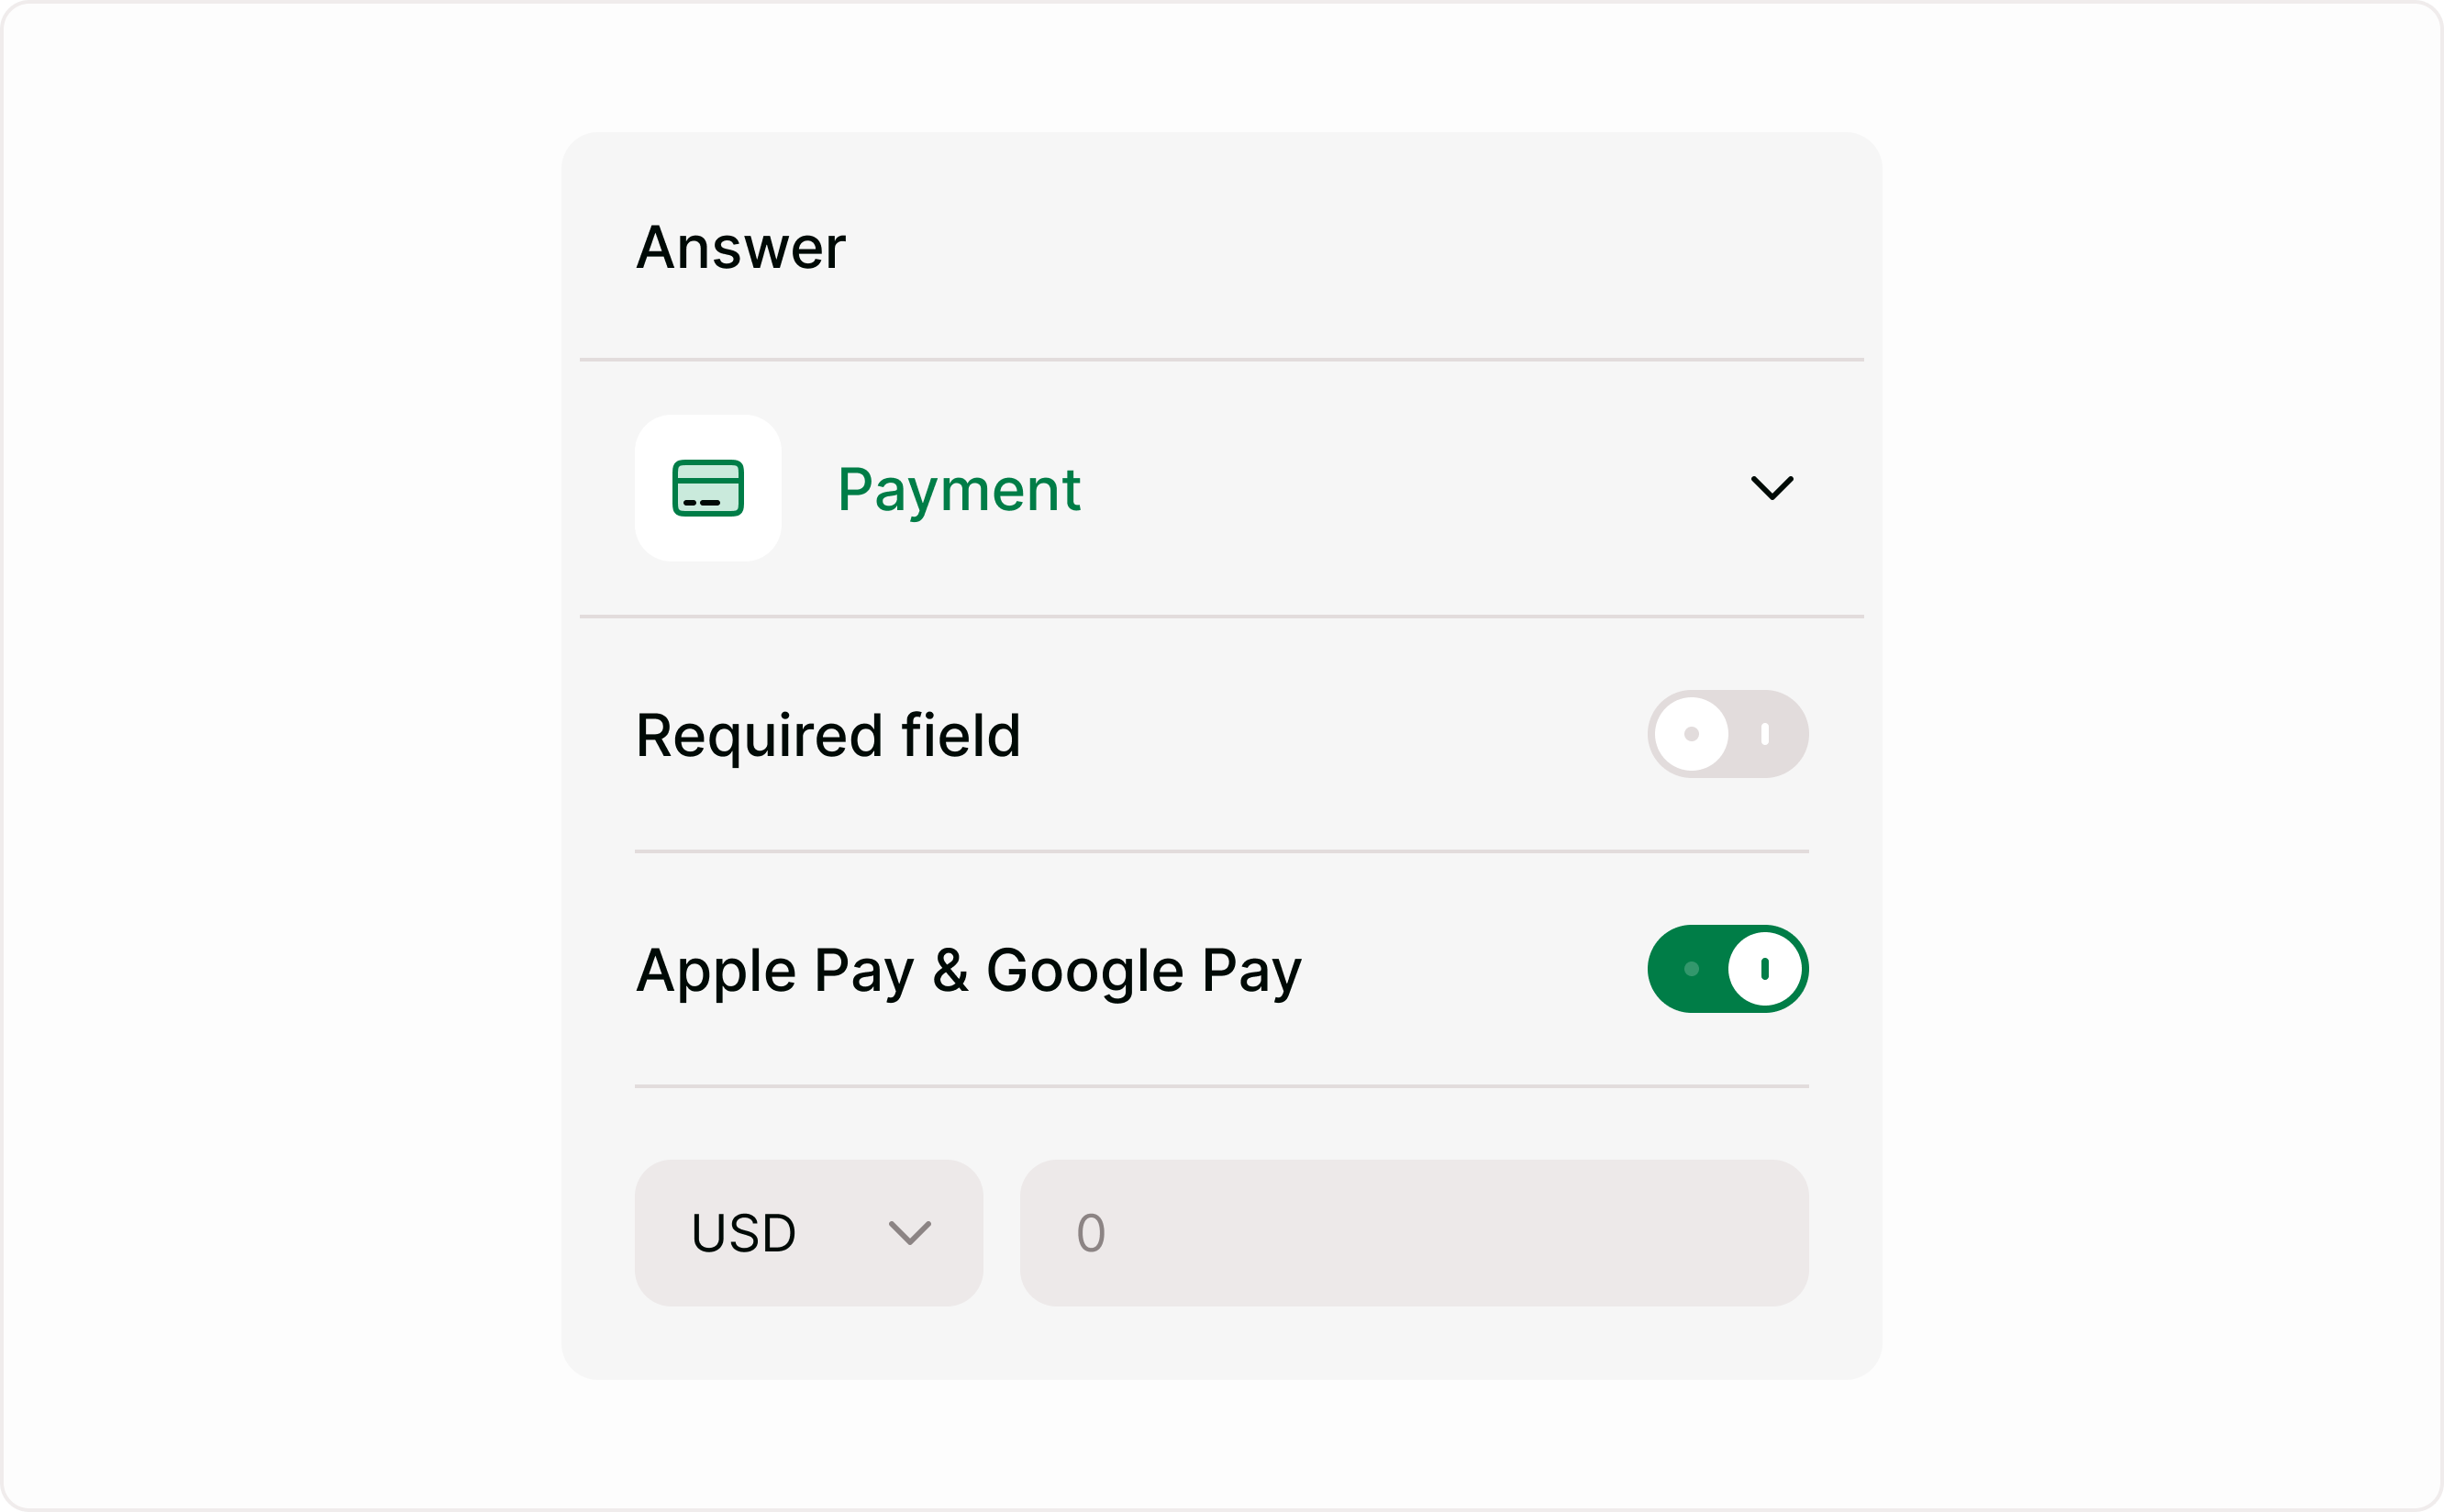
Enable Apple Pay and Google Pay
You can allow respondents to pay using supported digital wallets.
When enabled:
Apple Pay and Google Pay appear alongside card payments
Respondents can complete payment faster
Checkout friction is reduced
This is useful for mobile users and quick checkout scenarios.
This is useful for mobile users and quick checkout scenarios.
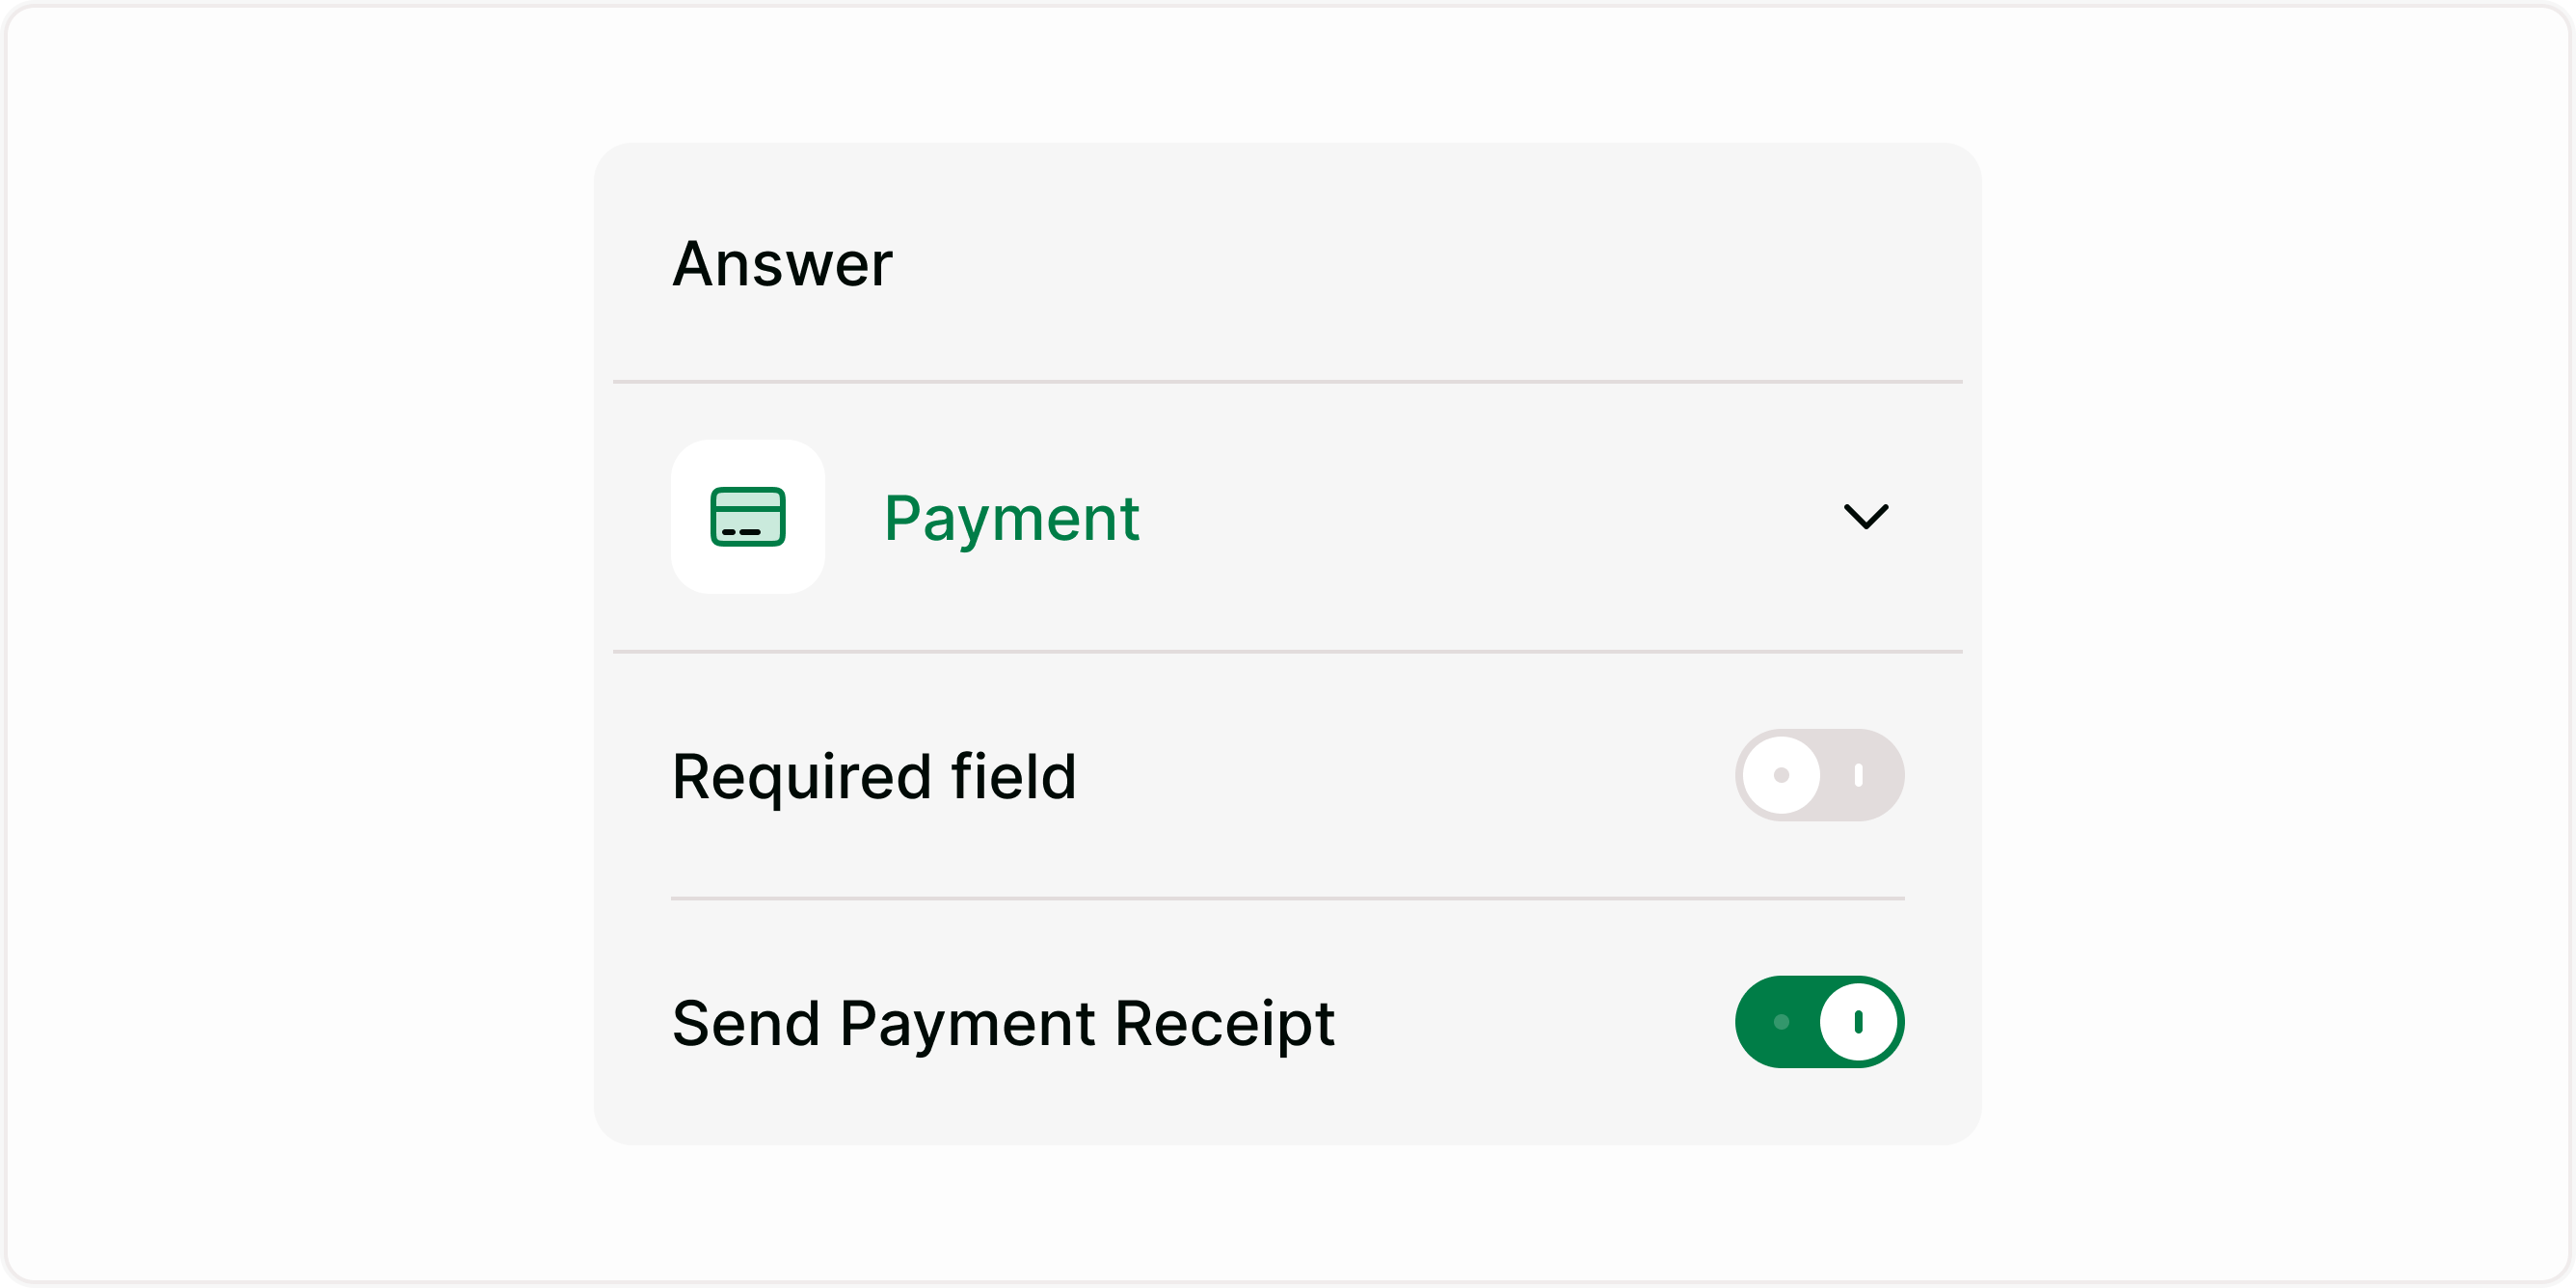
Send payment receipts
You can choose to send a payment receipt after a successful transaction.
When enabled:
Respondents receive a confirmation
Useful for purchases, bookings, and invoices
Improves trust and transparency
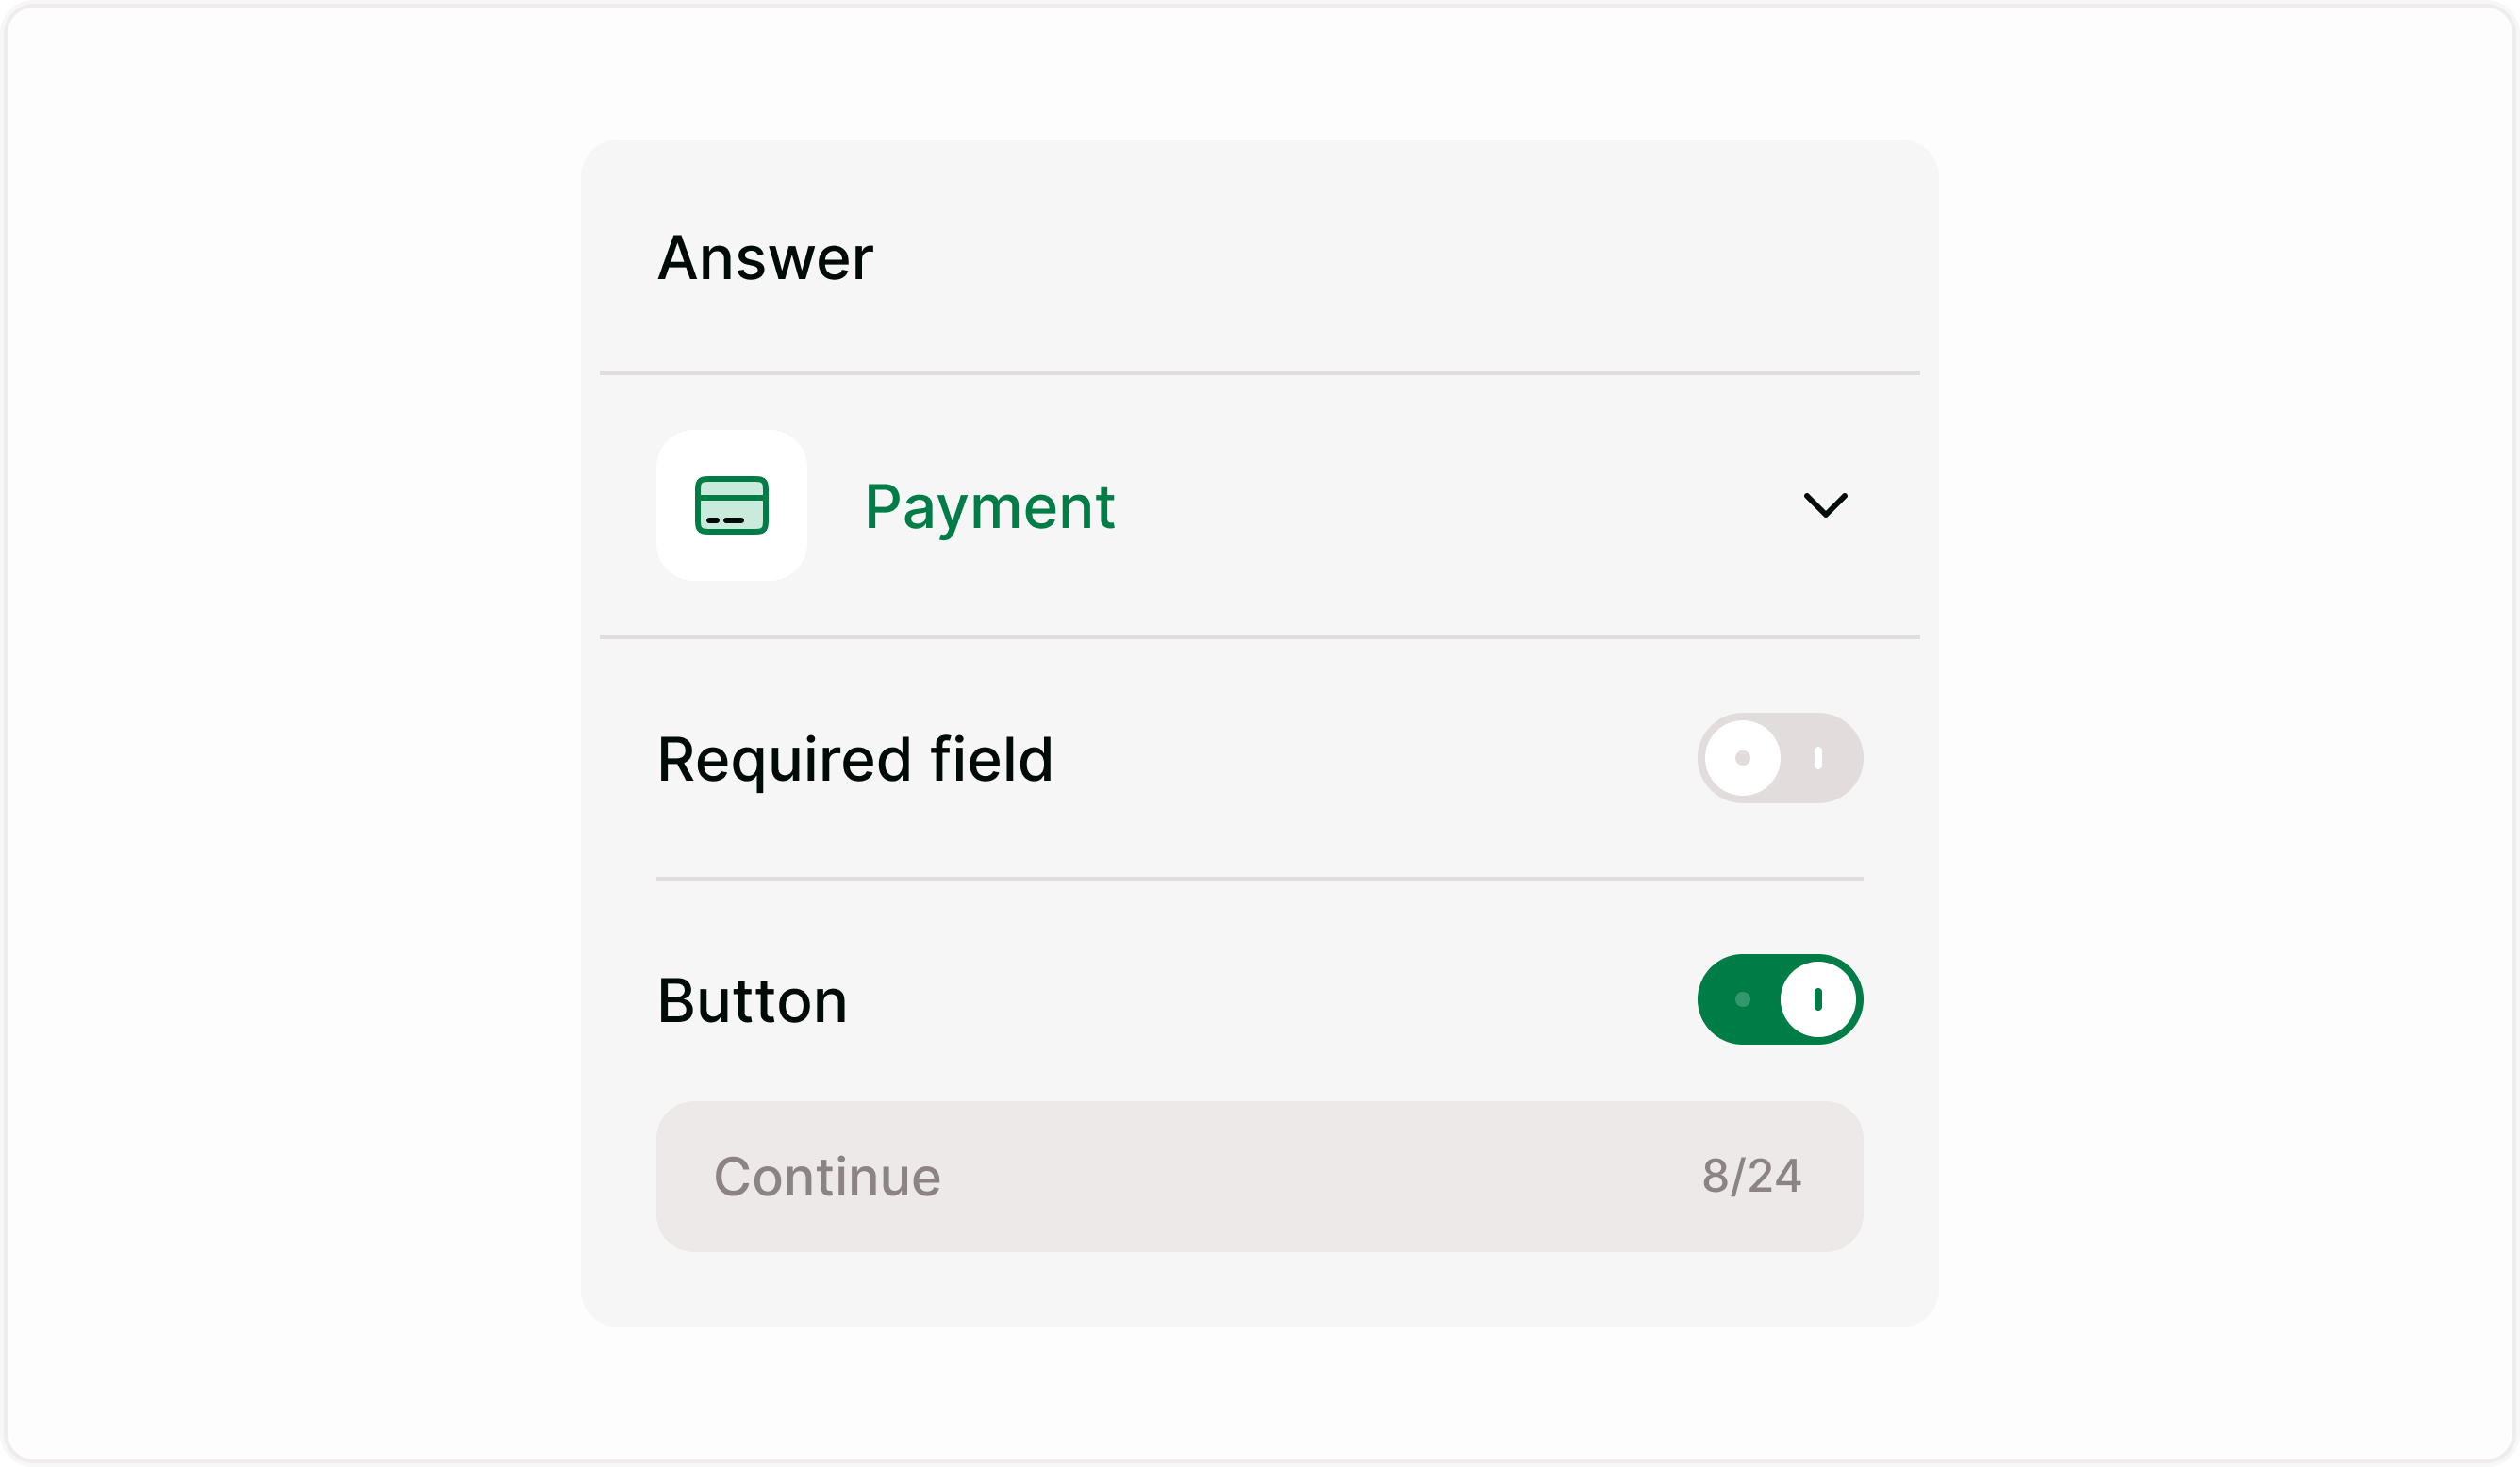
Customize the payment button
You can control the button label shown during checkout.
Examples:Continue
Pay now
Complete booking
Confirm payment
This helps match the payment step to your form’s context.
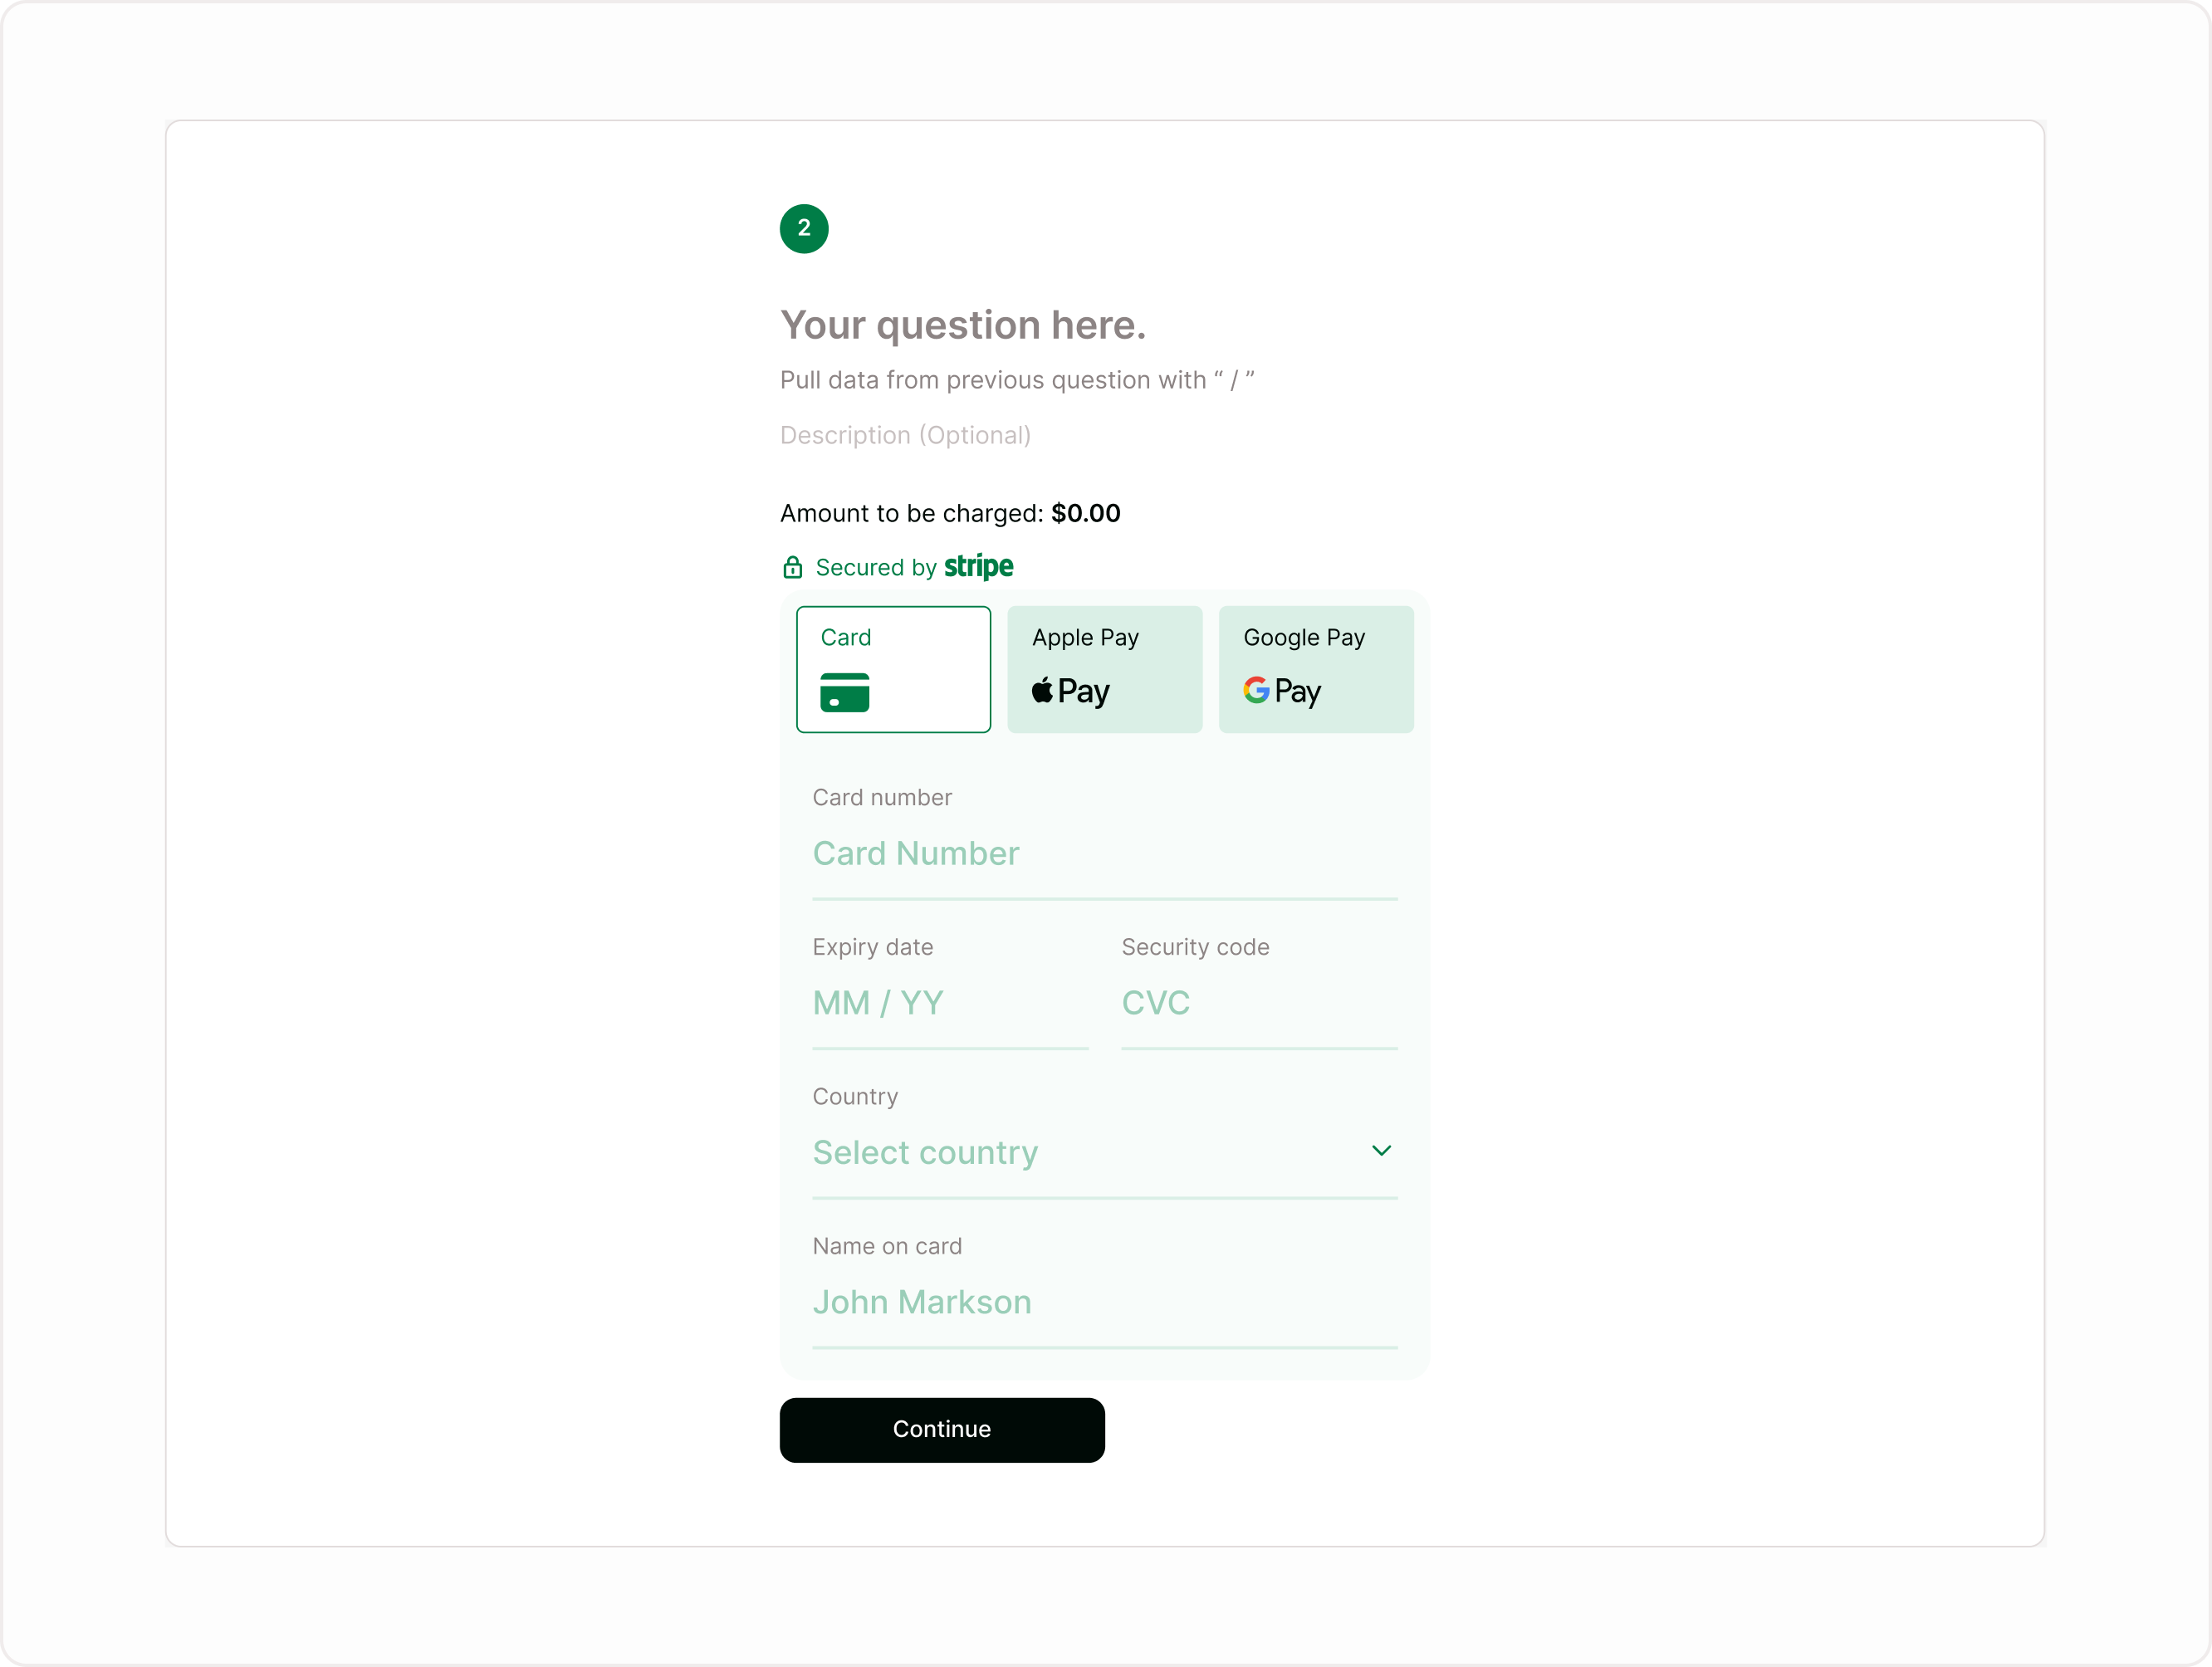
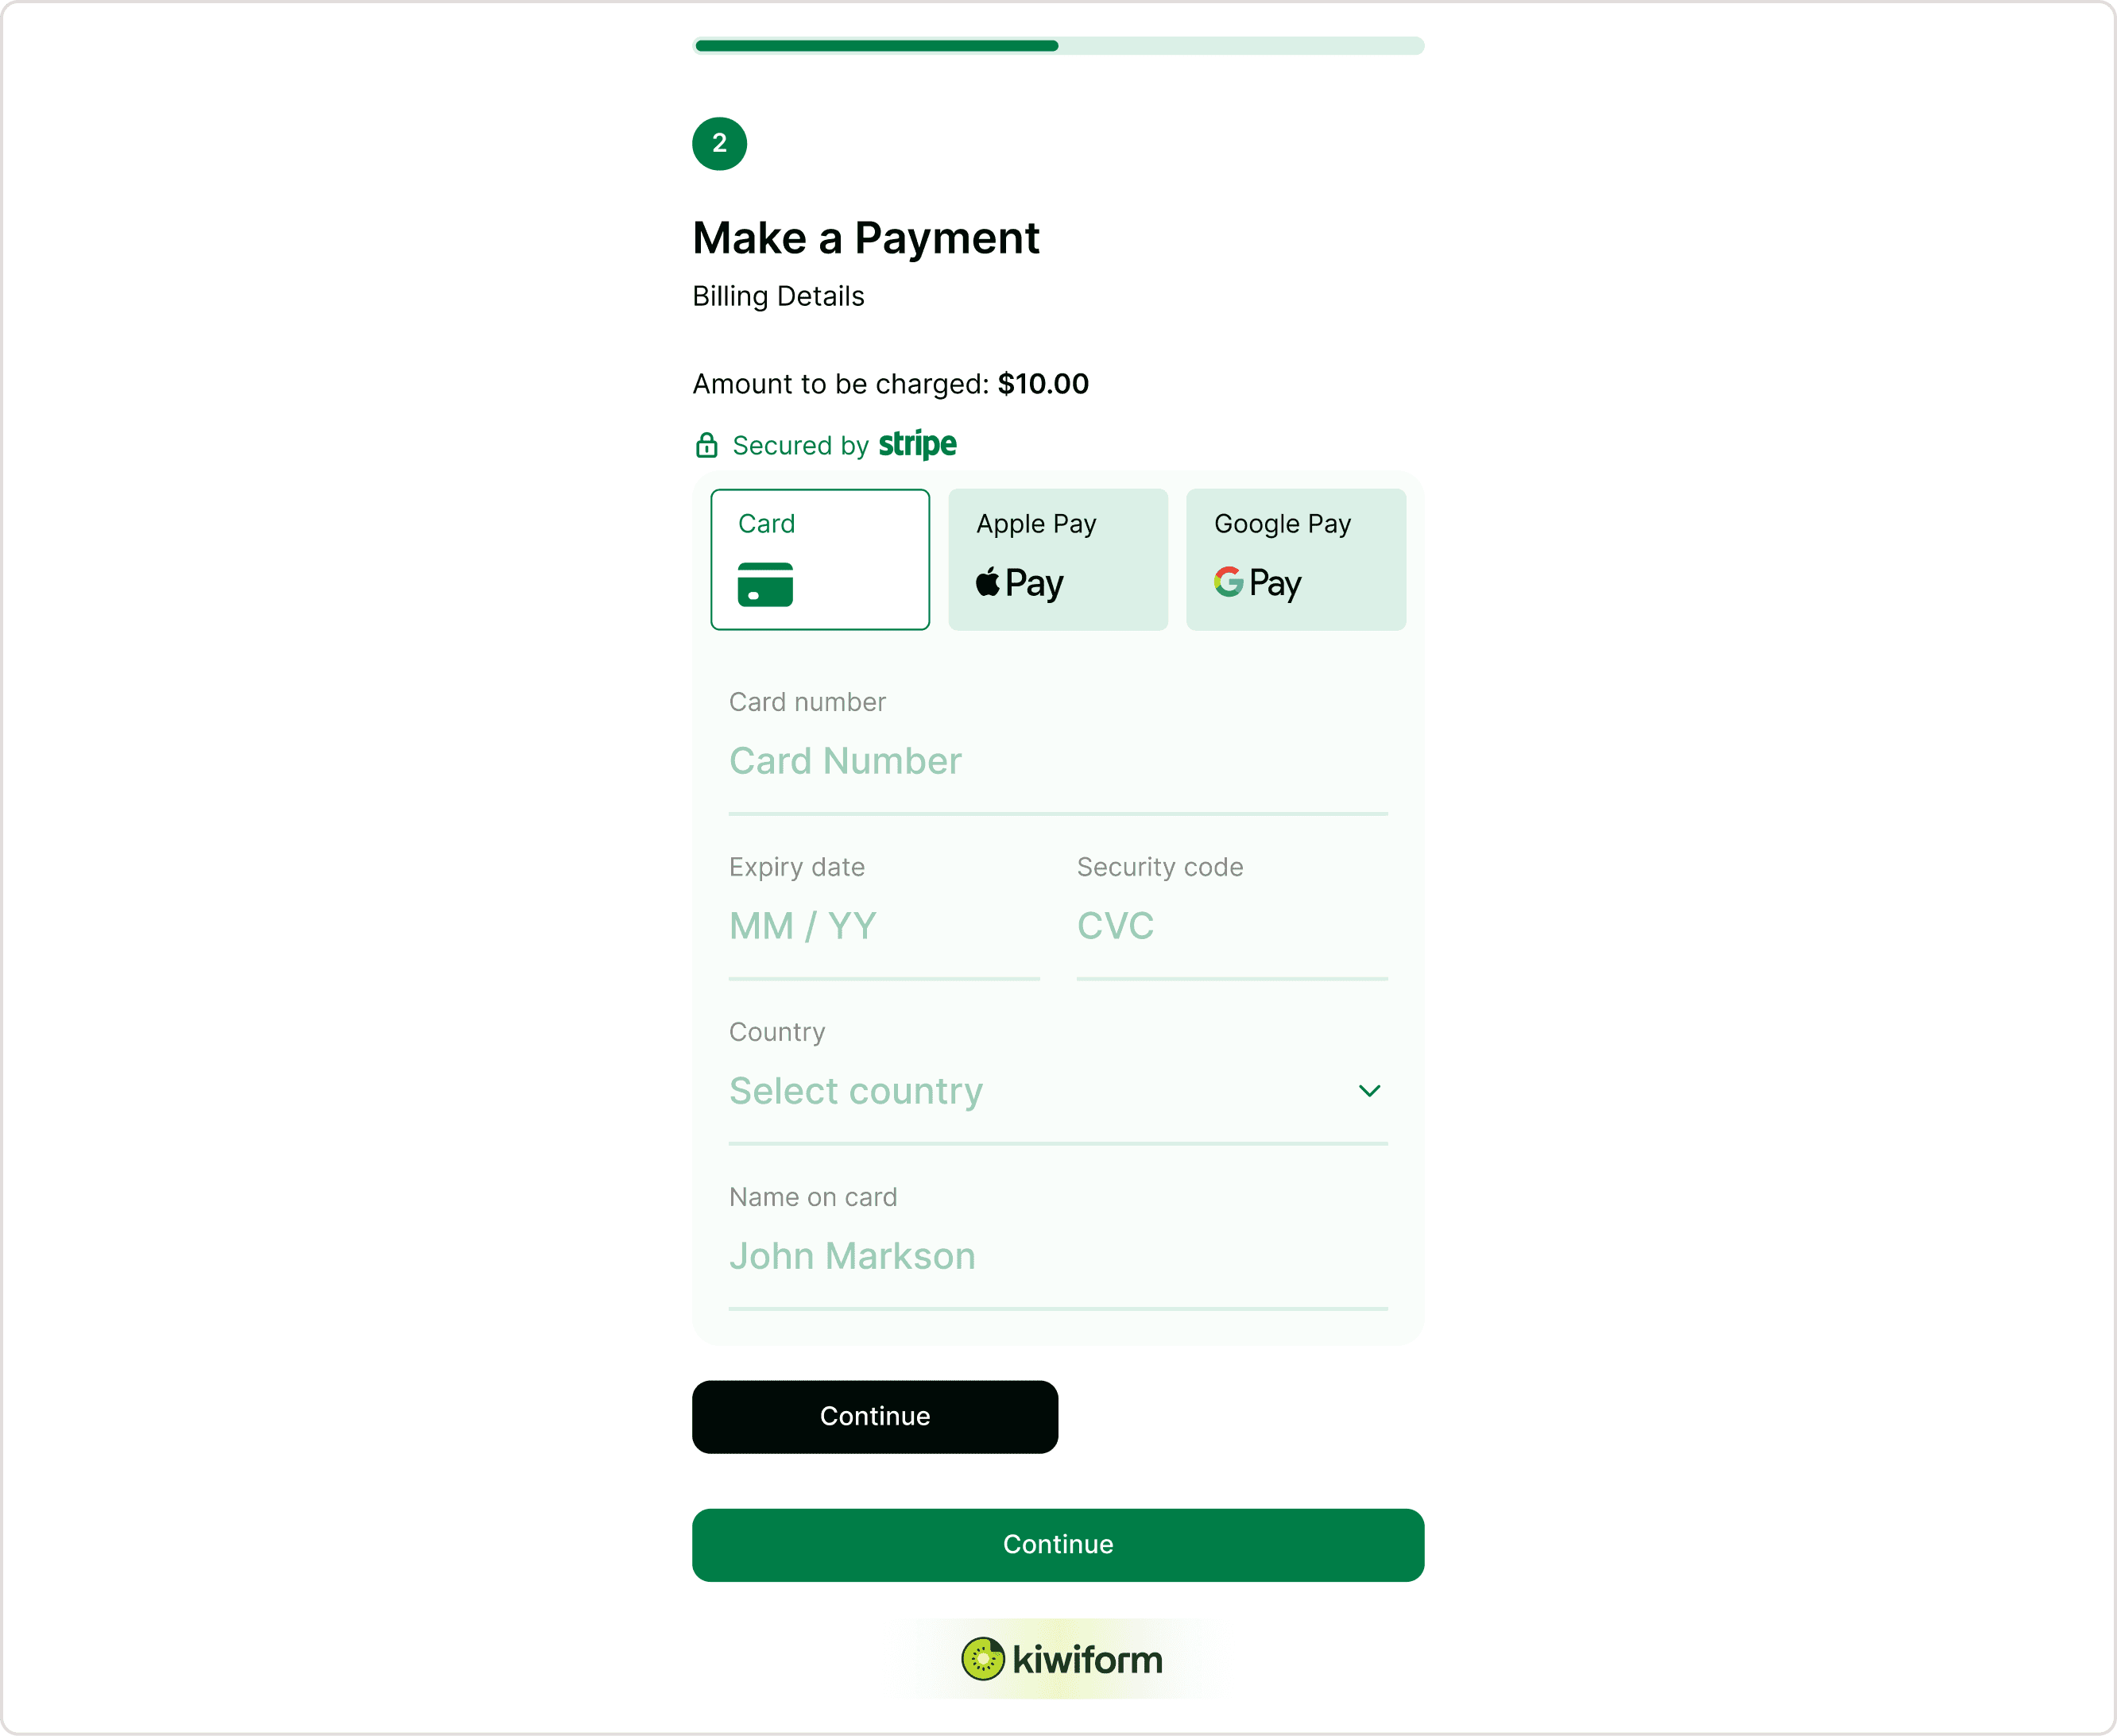
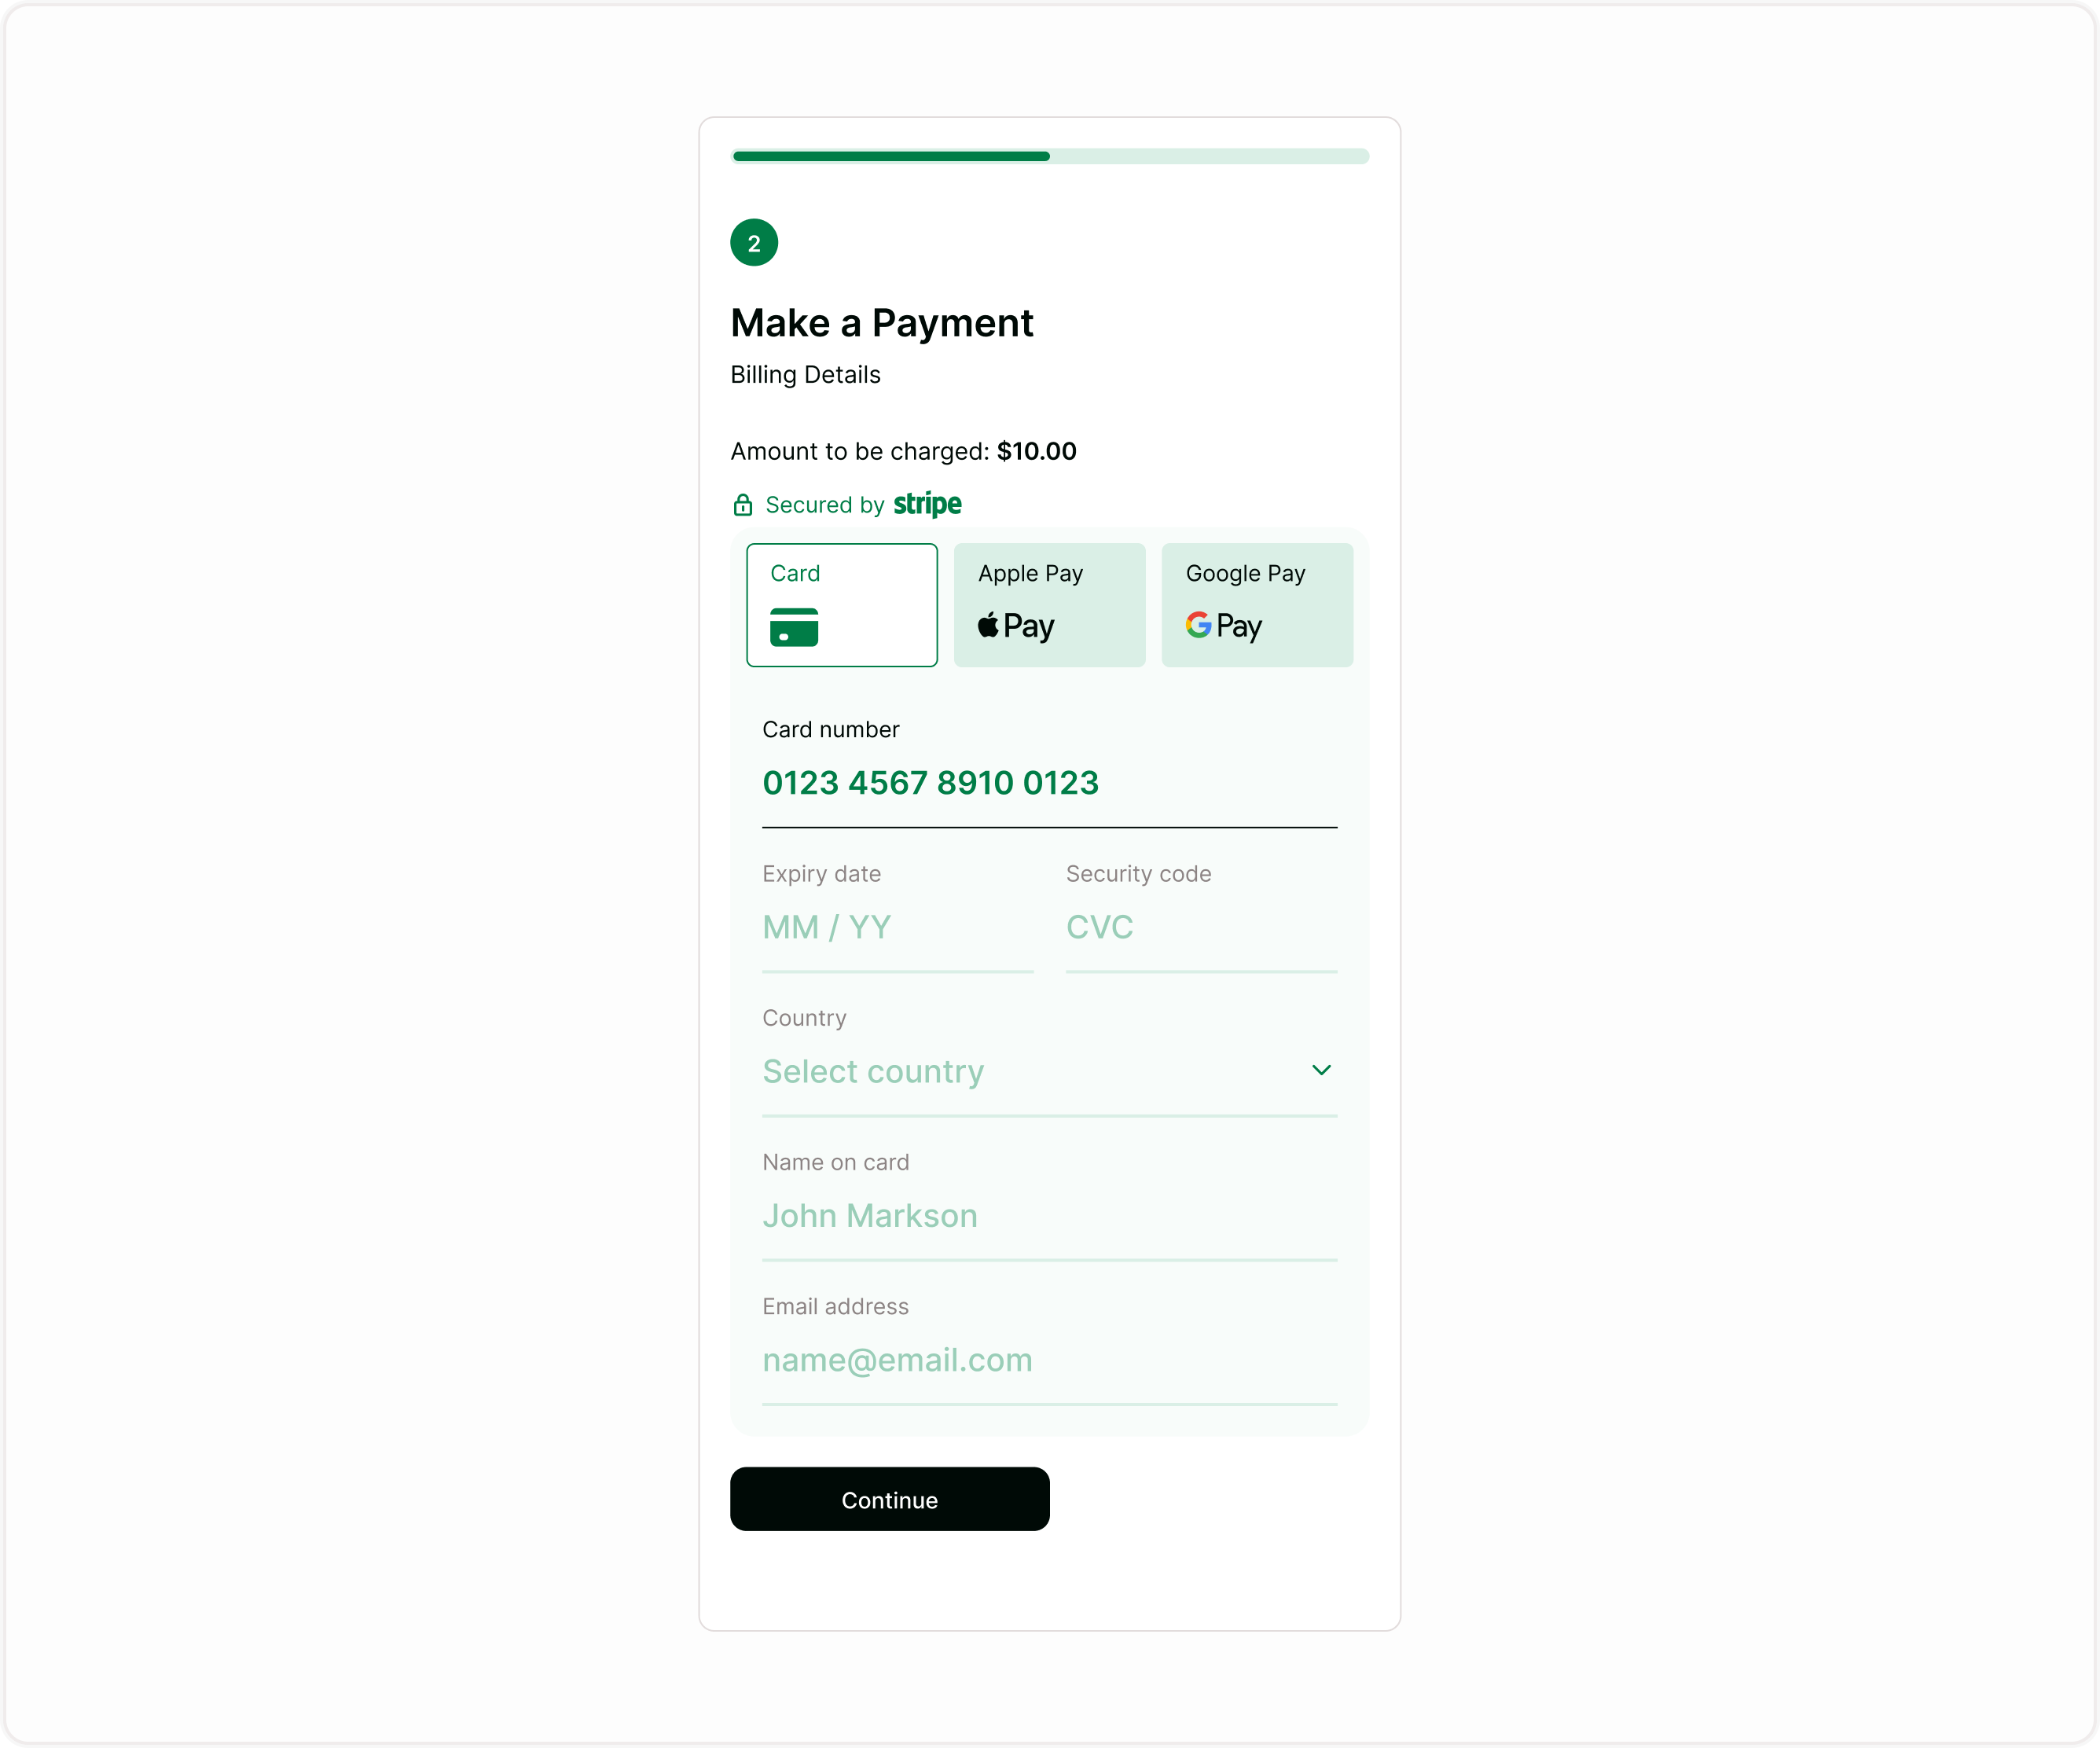
Respondent experience
When respondents reach the Payment field:
They see the amount to be charged
Payment options appear (card, Apple Pay, Google Pay if enabled)
They enter card details securely
They complete payment without leaving the form
The interface is embedded inside the form and optimized for desktop and mobile.
Common use cases
Event registrations
Service bookings
Digital products
Course enrolments
Best practices
Place the Payment field near the end
Clearly explain the charge
Confirm pricing
Test before going live
Summary
The Payment field lets you accept payments inside your form using Stripe. You can connect a Stripe account, set currency and amount, enable wallets like Apple Pay and Google Pay, send receipts, and control the payment button. This guide covers setup, configuration, respondent experience, and common use cases so you can confidently collect payments through your form.