What are Custom Domains in Kiwiform?
Custom domains allow you to replace the default Kiwiform share link with a domain you own. Instead of sharing a generic URL, you can use a branded link that aligns with your website, product, or organization.
For example, instead of using a default share link, you can create URLs that look like your own domain. This helps users recognize your brand instantly and improves trust when they open your forms.
Custom domains are especially useful when forms are part of your external workflows such as lead generation, onboarding, feedback collection, or surveys where branding and credibility matter.
How to Add a Custom Domain
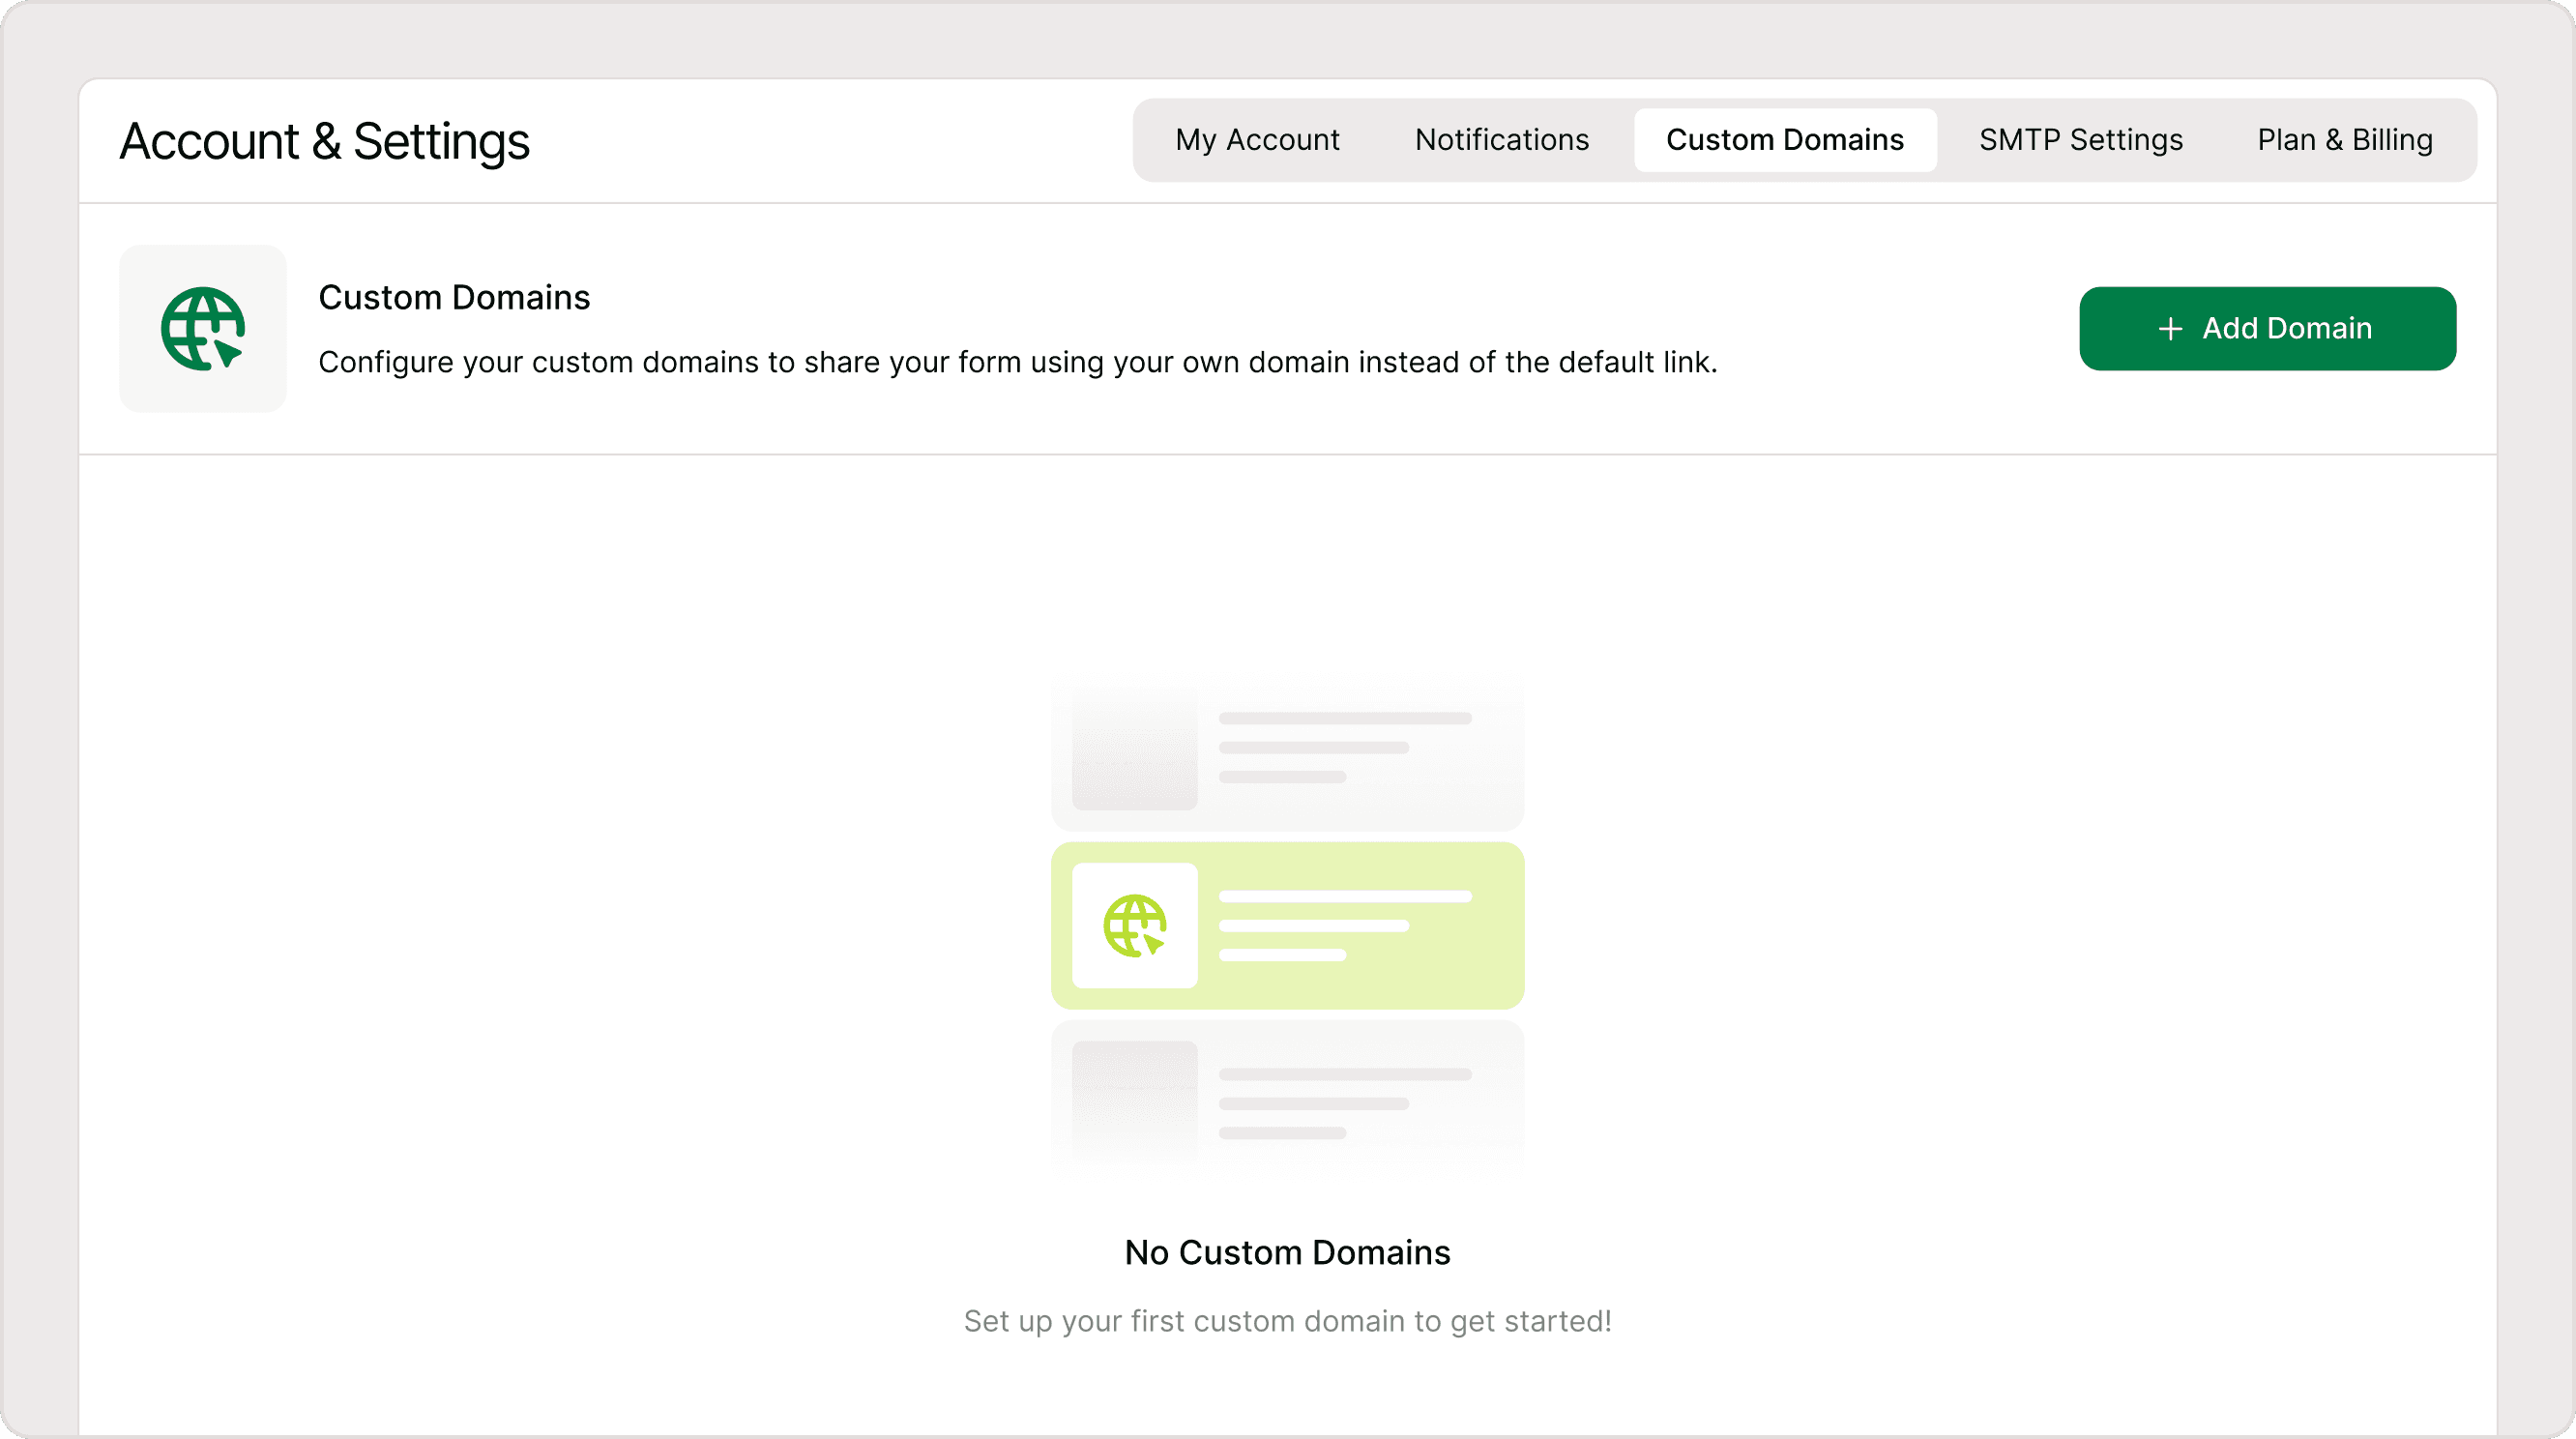
You can add and manage domains from the Custom Domains tab inside Account & Settings.
Steps:
Go to Account & Settings
Open the Custom Domains tab
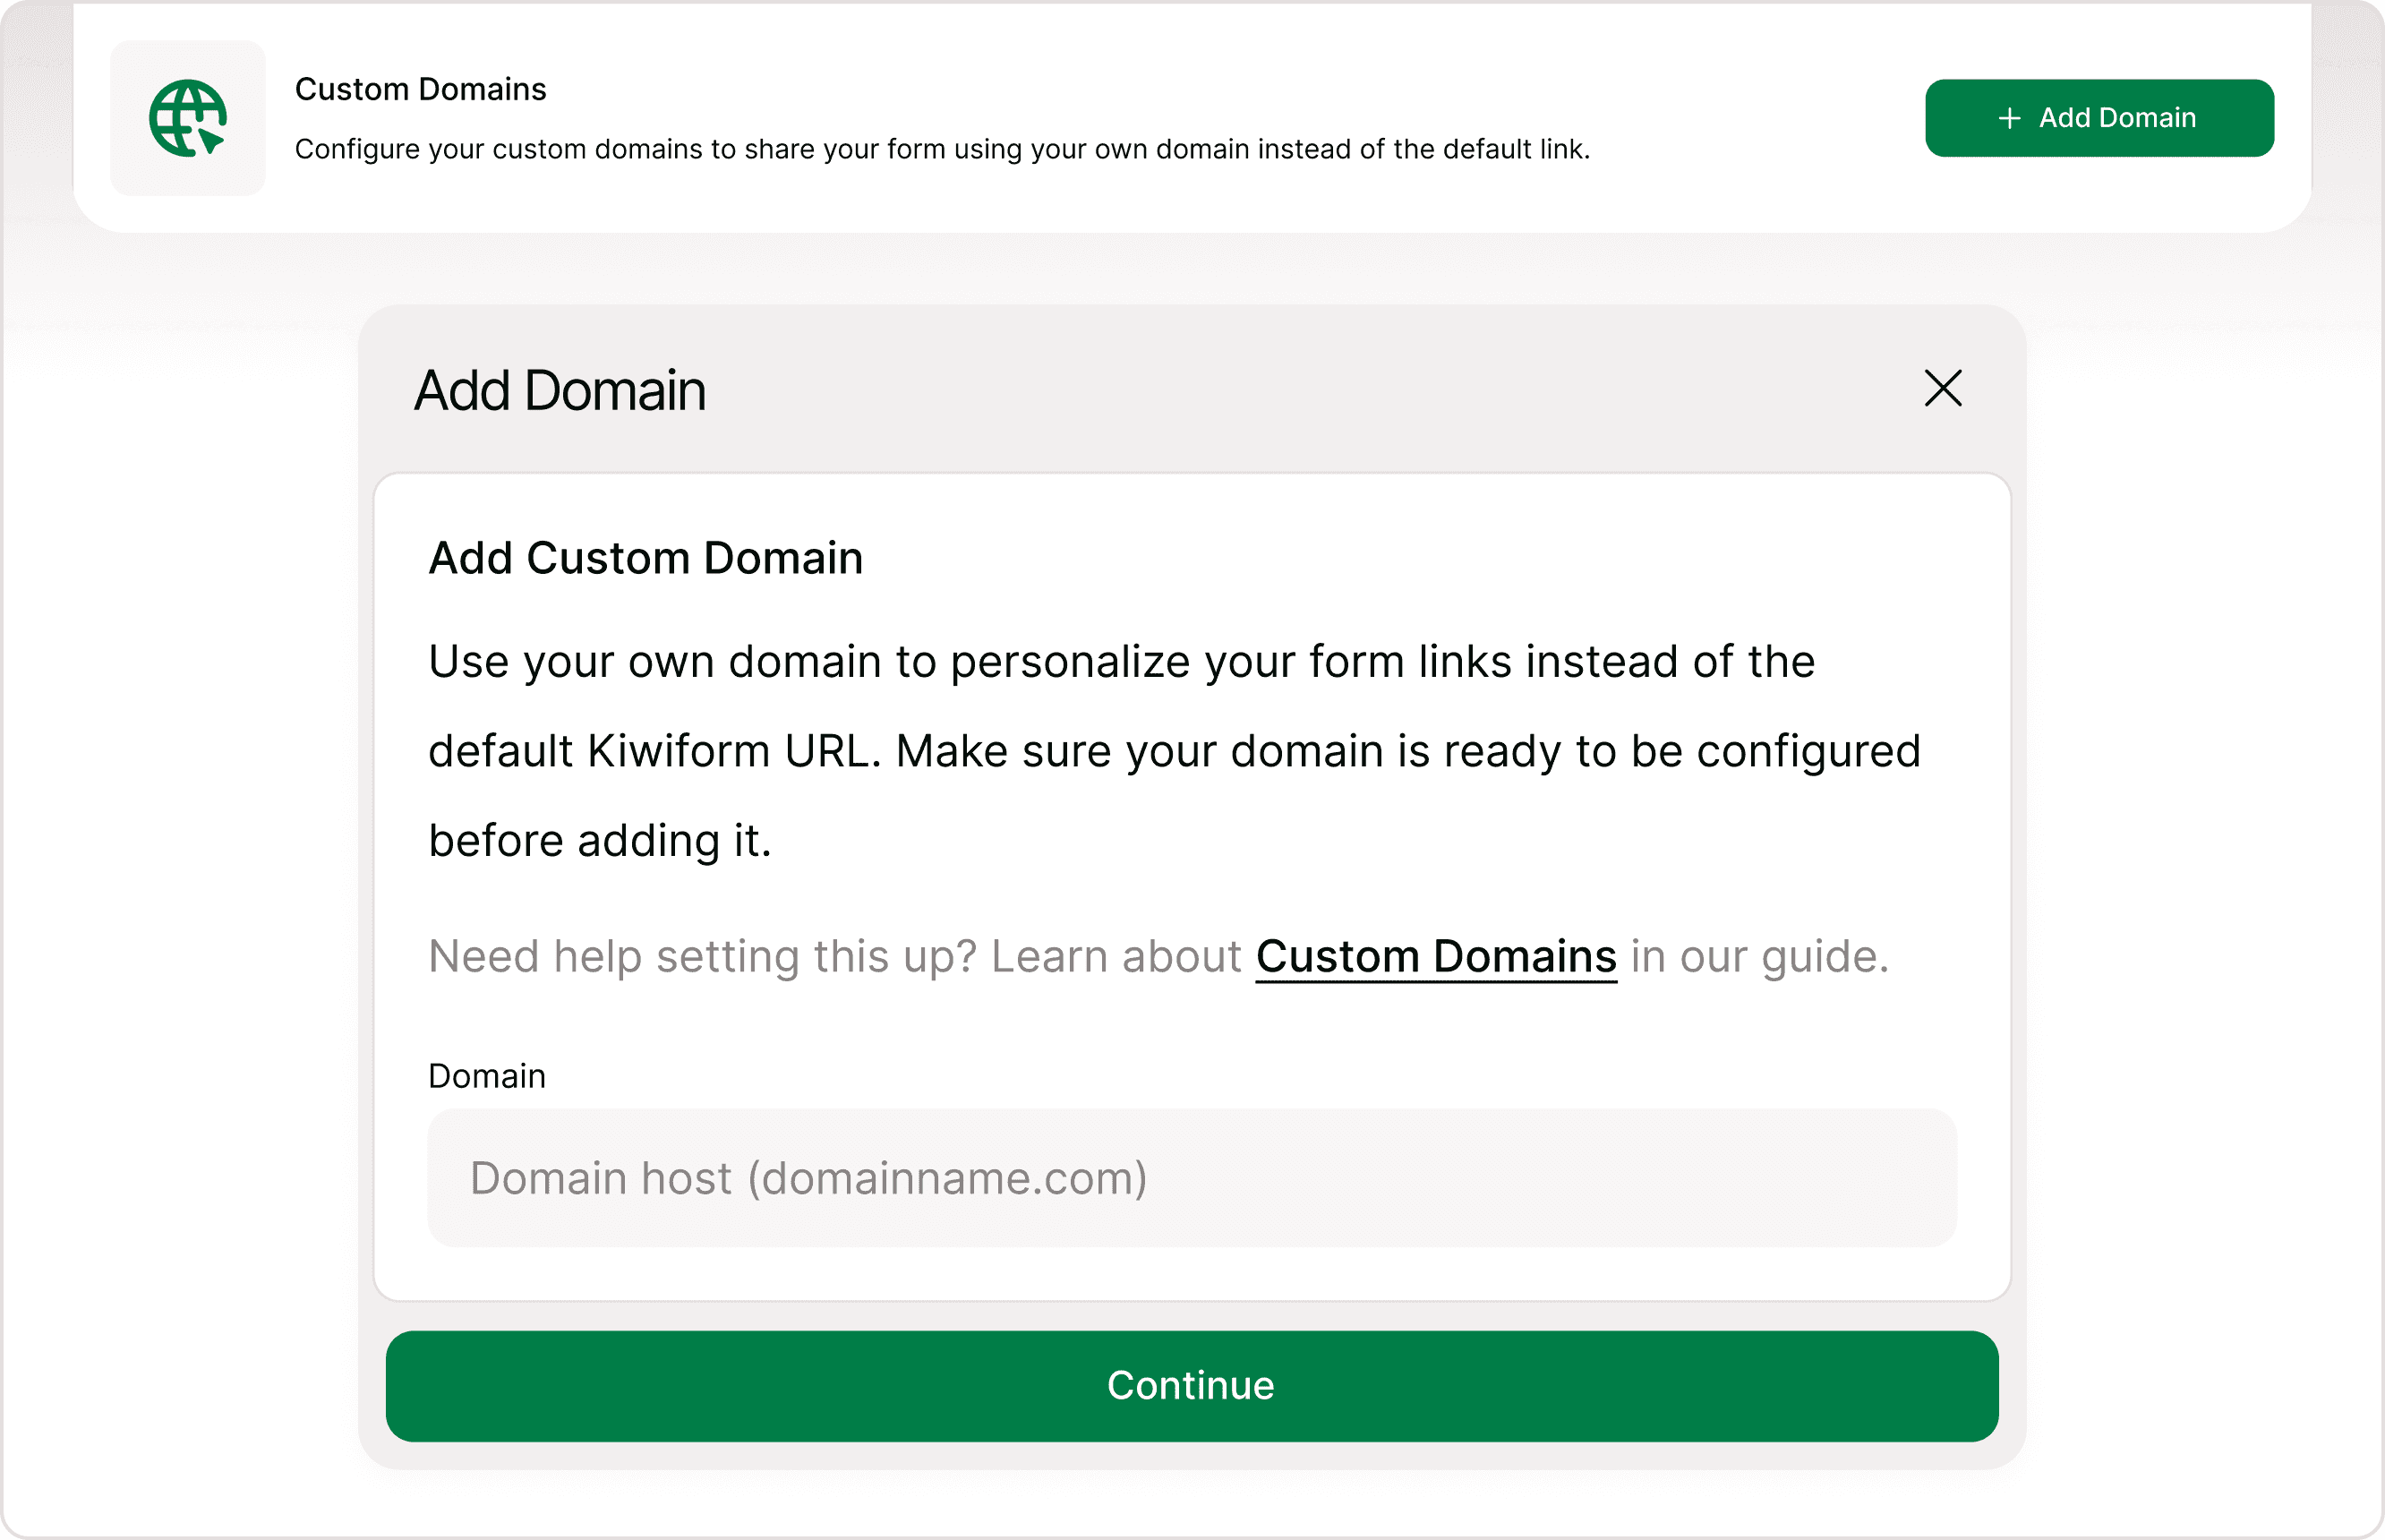
Click + Add Domain
Enter your domain or subdomain (for example, forms.yourdomain.com)
Click Continue
Once added, you will be guided to configure DNS records required to verify your domain.
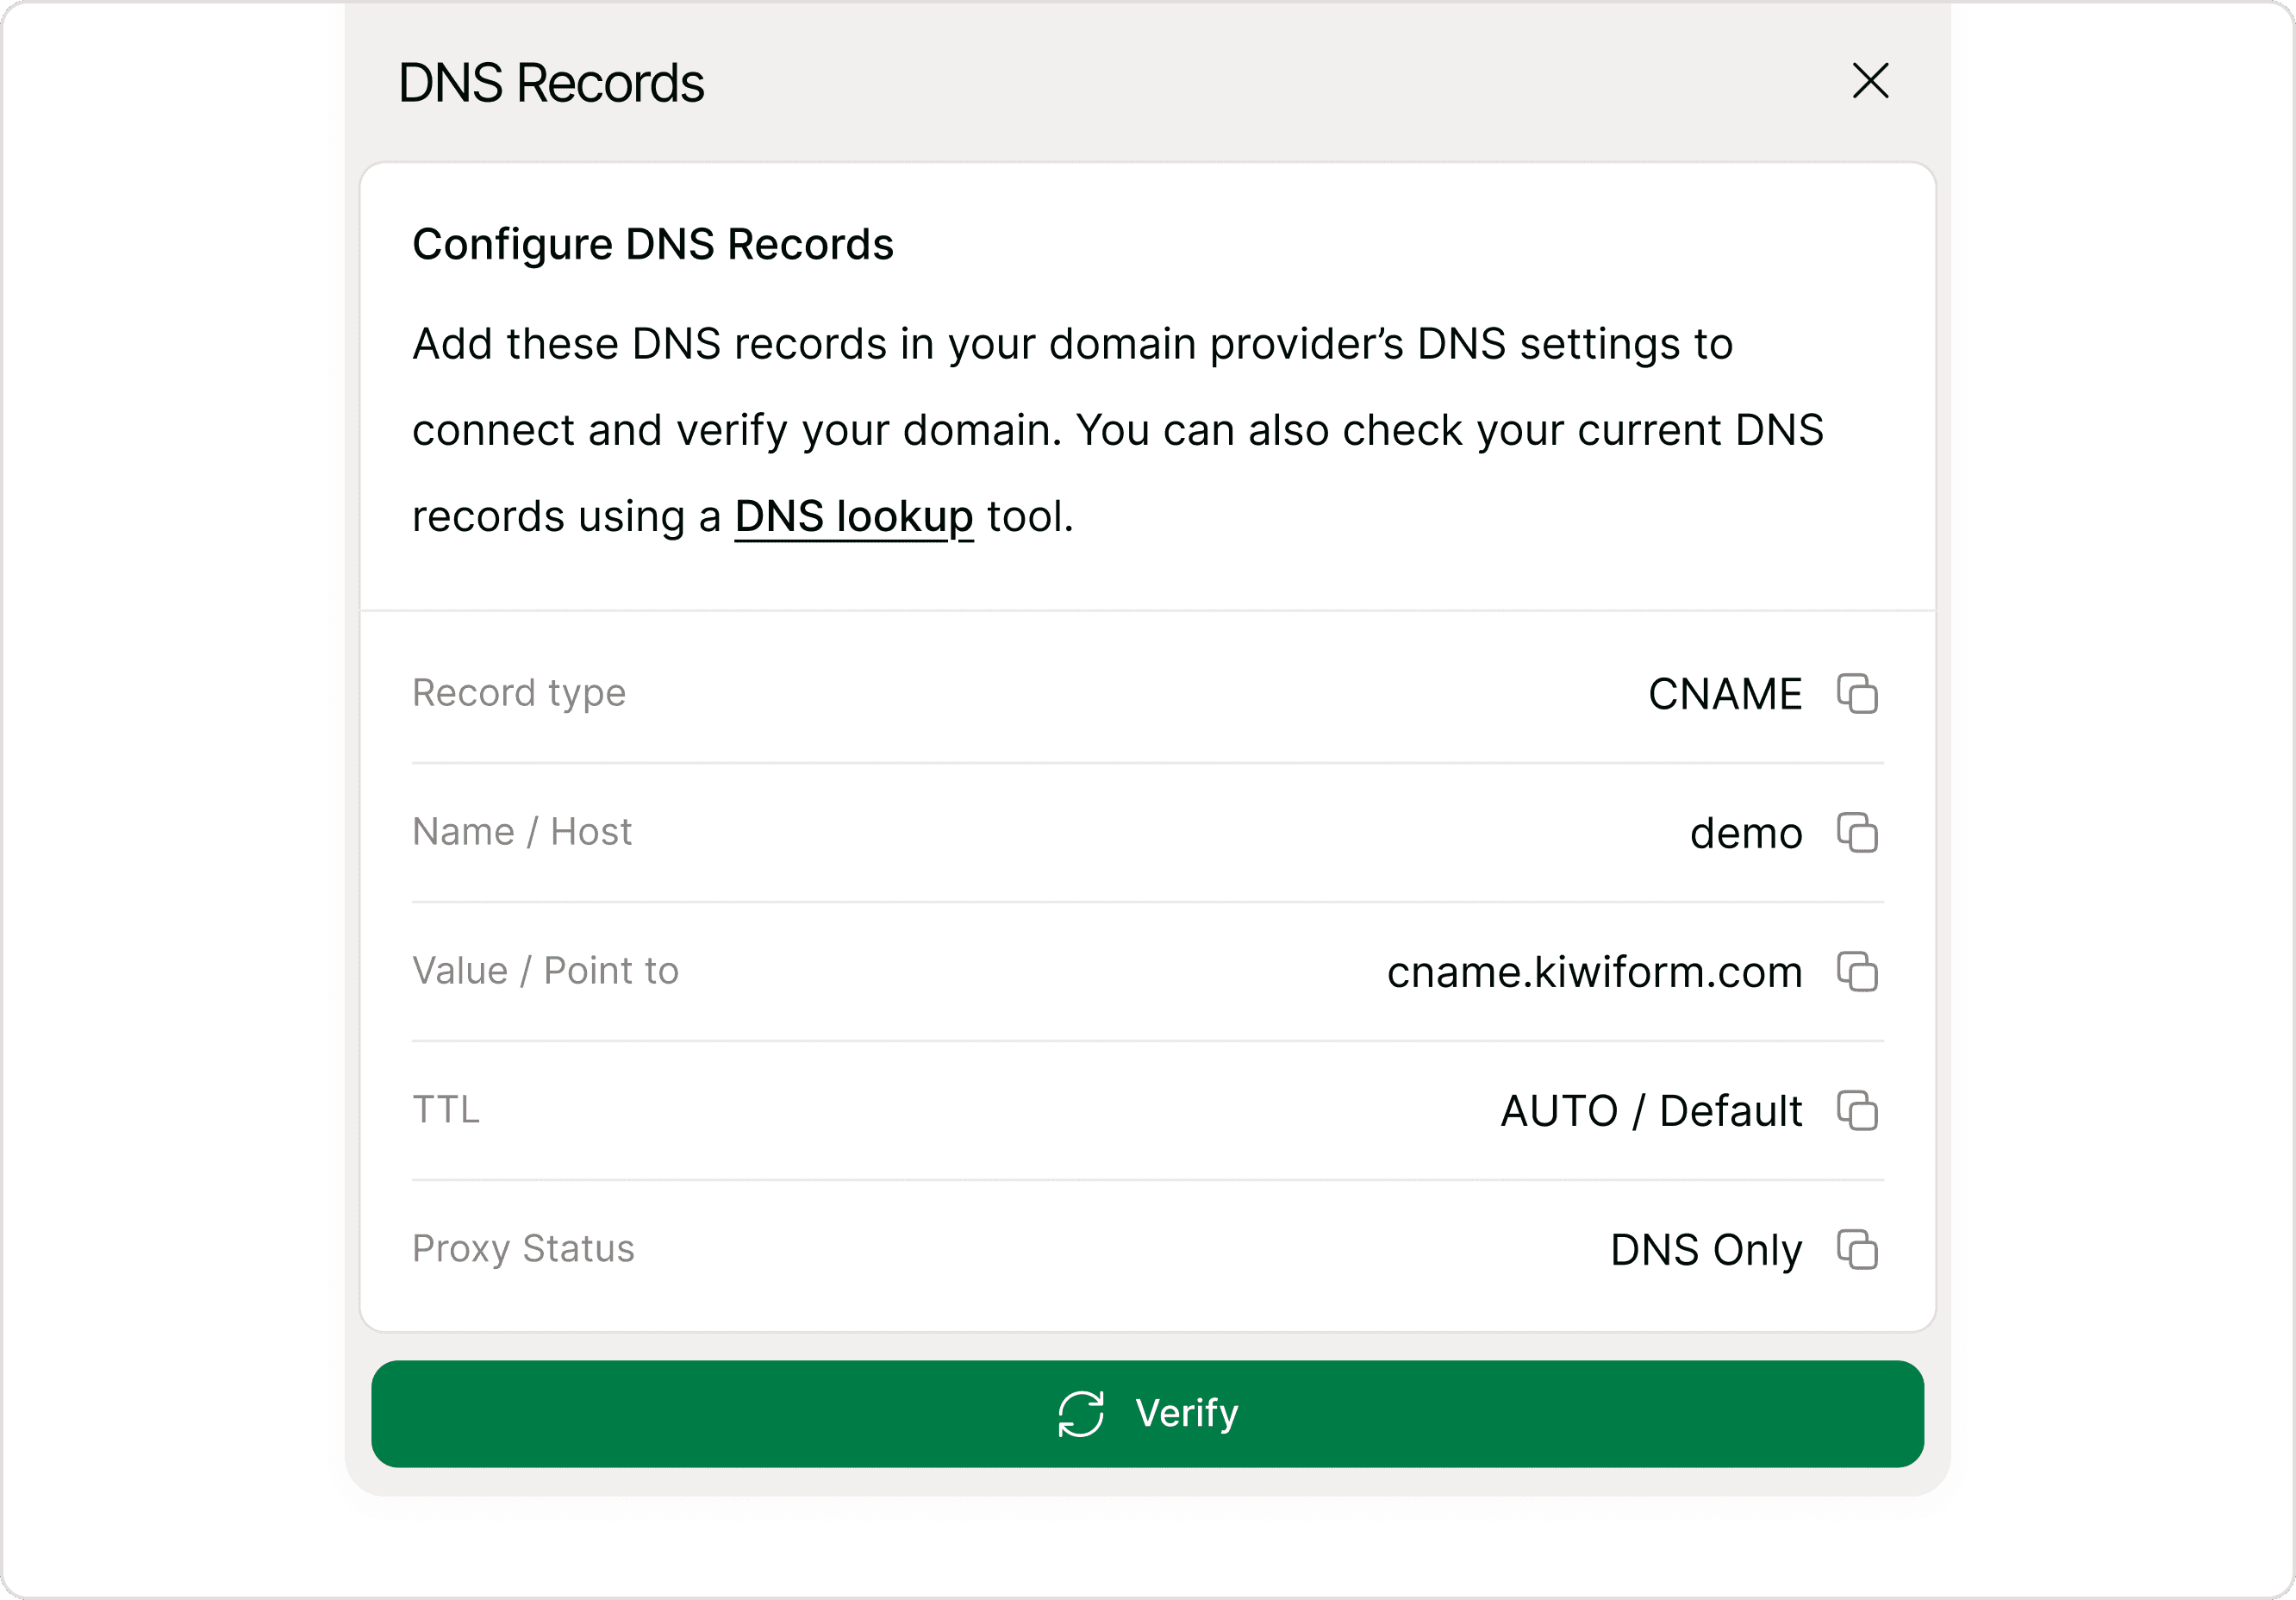
Configure DNS Records
After adding your domain, Kiwiform provides DNS records that must be configured with your domain provider. This step connects your domain to Kiwiform.
You need to:
Copy the DNS records shown in Kiwiform
Add them to your domain provider (such as GoDaddy, Cloudflare, or similar services)
Save the configuration
After completing this, return to Kiwiform and click Verify to begin connection.
DNS updates may take some time depending on your provider.
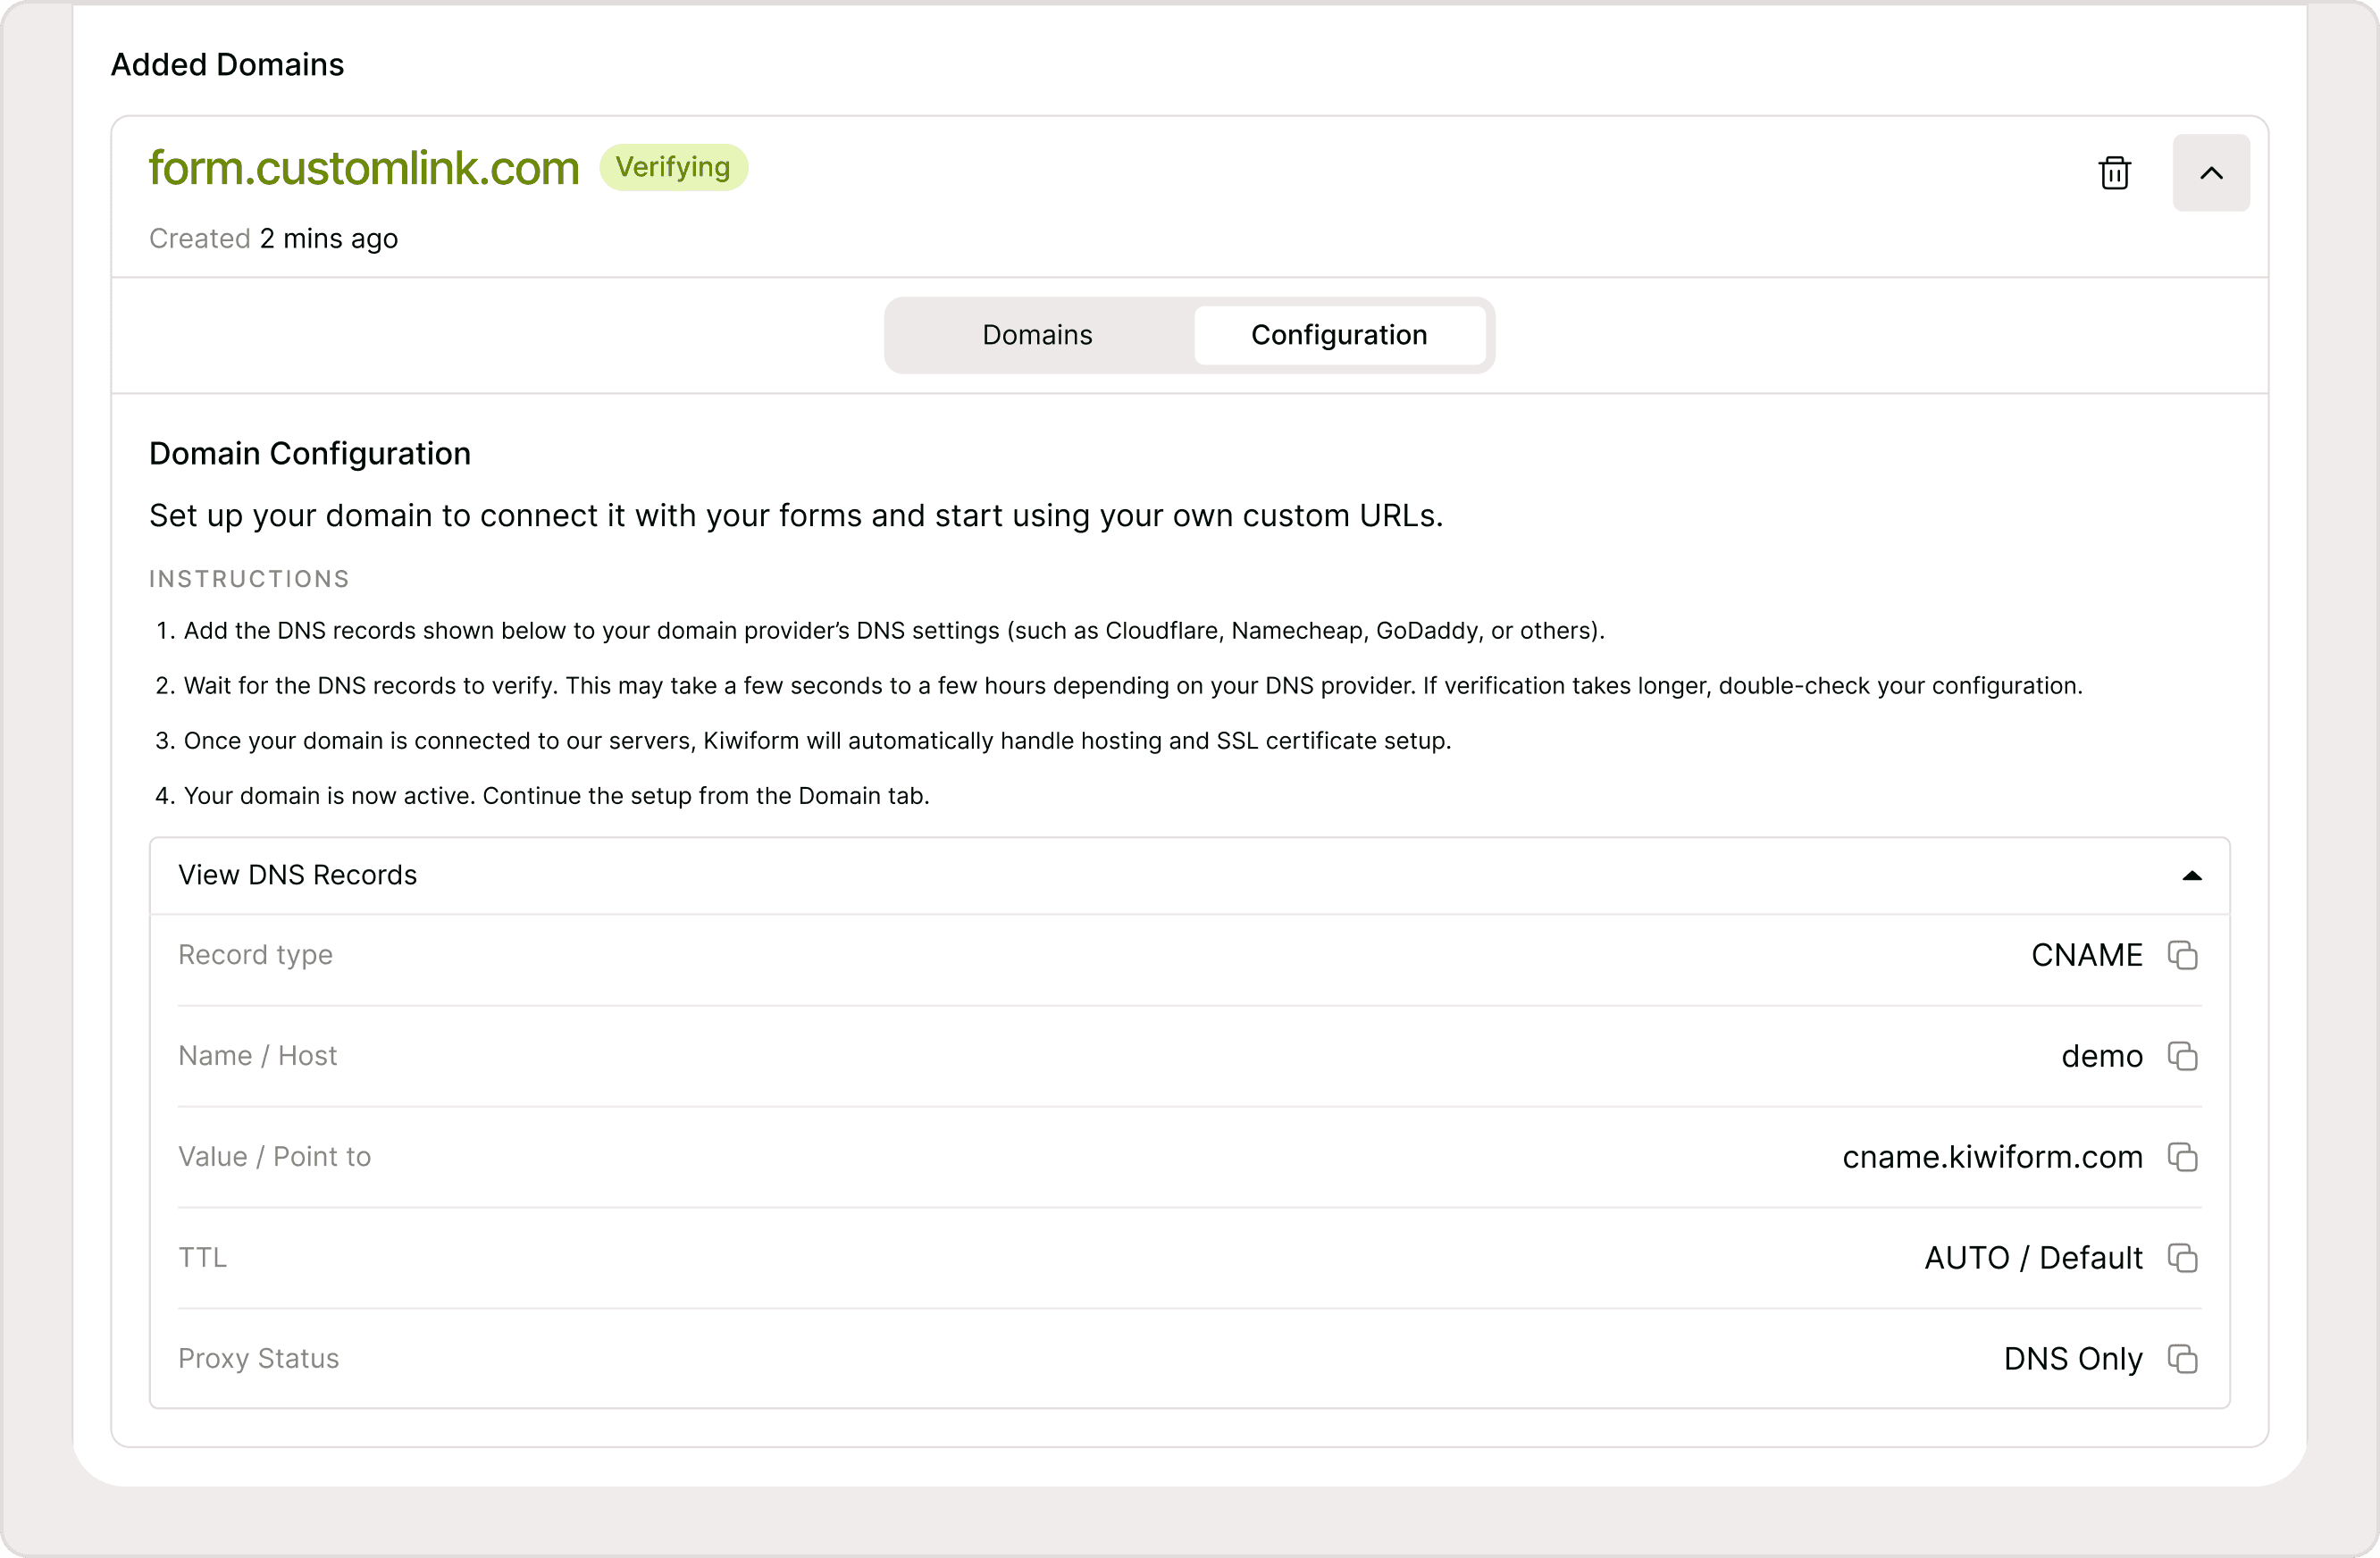
Managing Custom Domains
Once a domain is added, you can manage it directly from the Added Domains section.
You can:
View domain status
Expand details for configuration
Retry verification
Delete domains
Access configuration instructions
Each domain includes two key sections: Domains and Configuration, which help you manage both connection and usage.
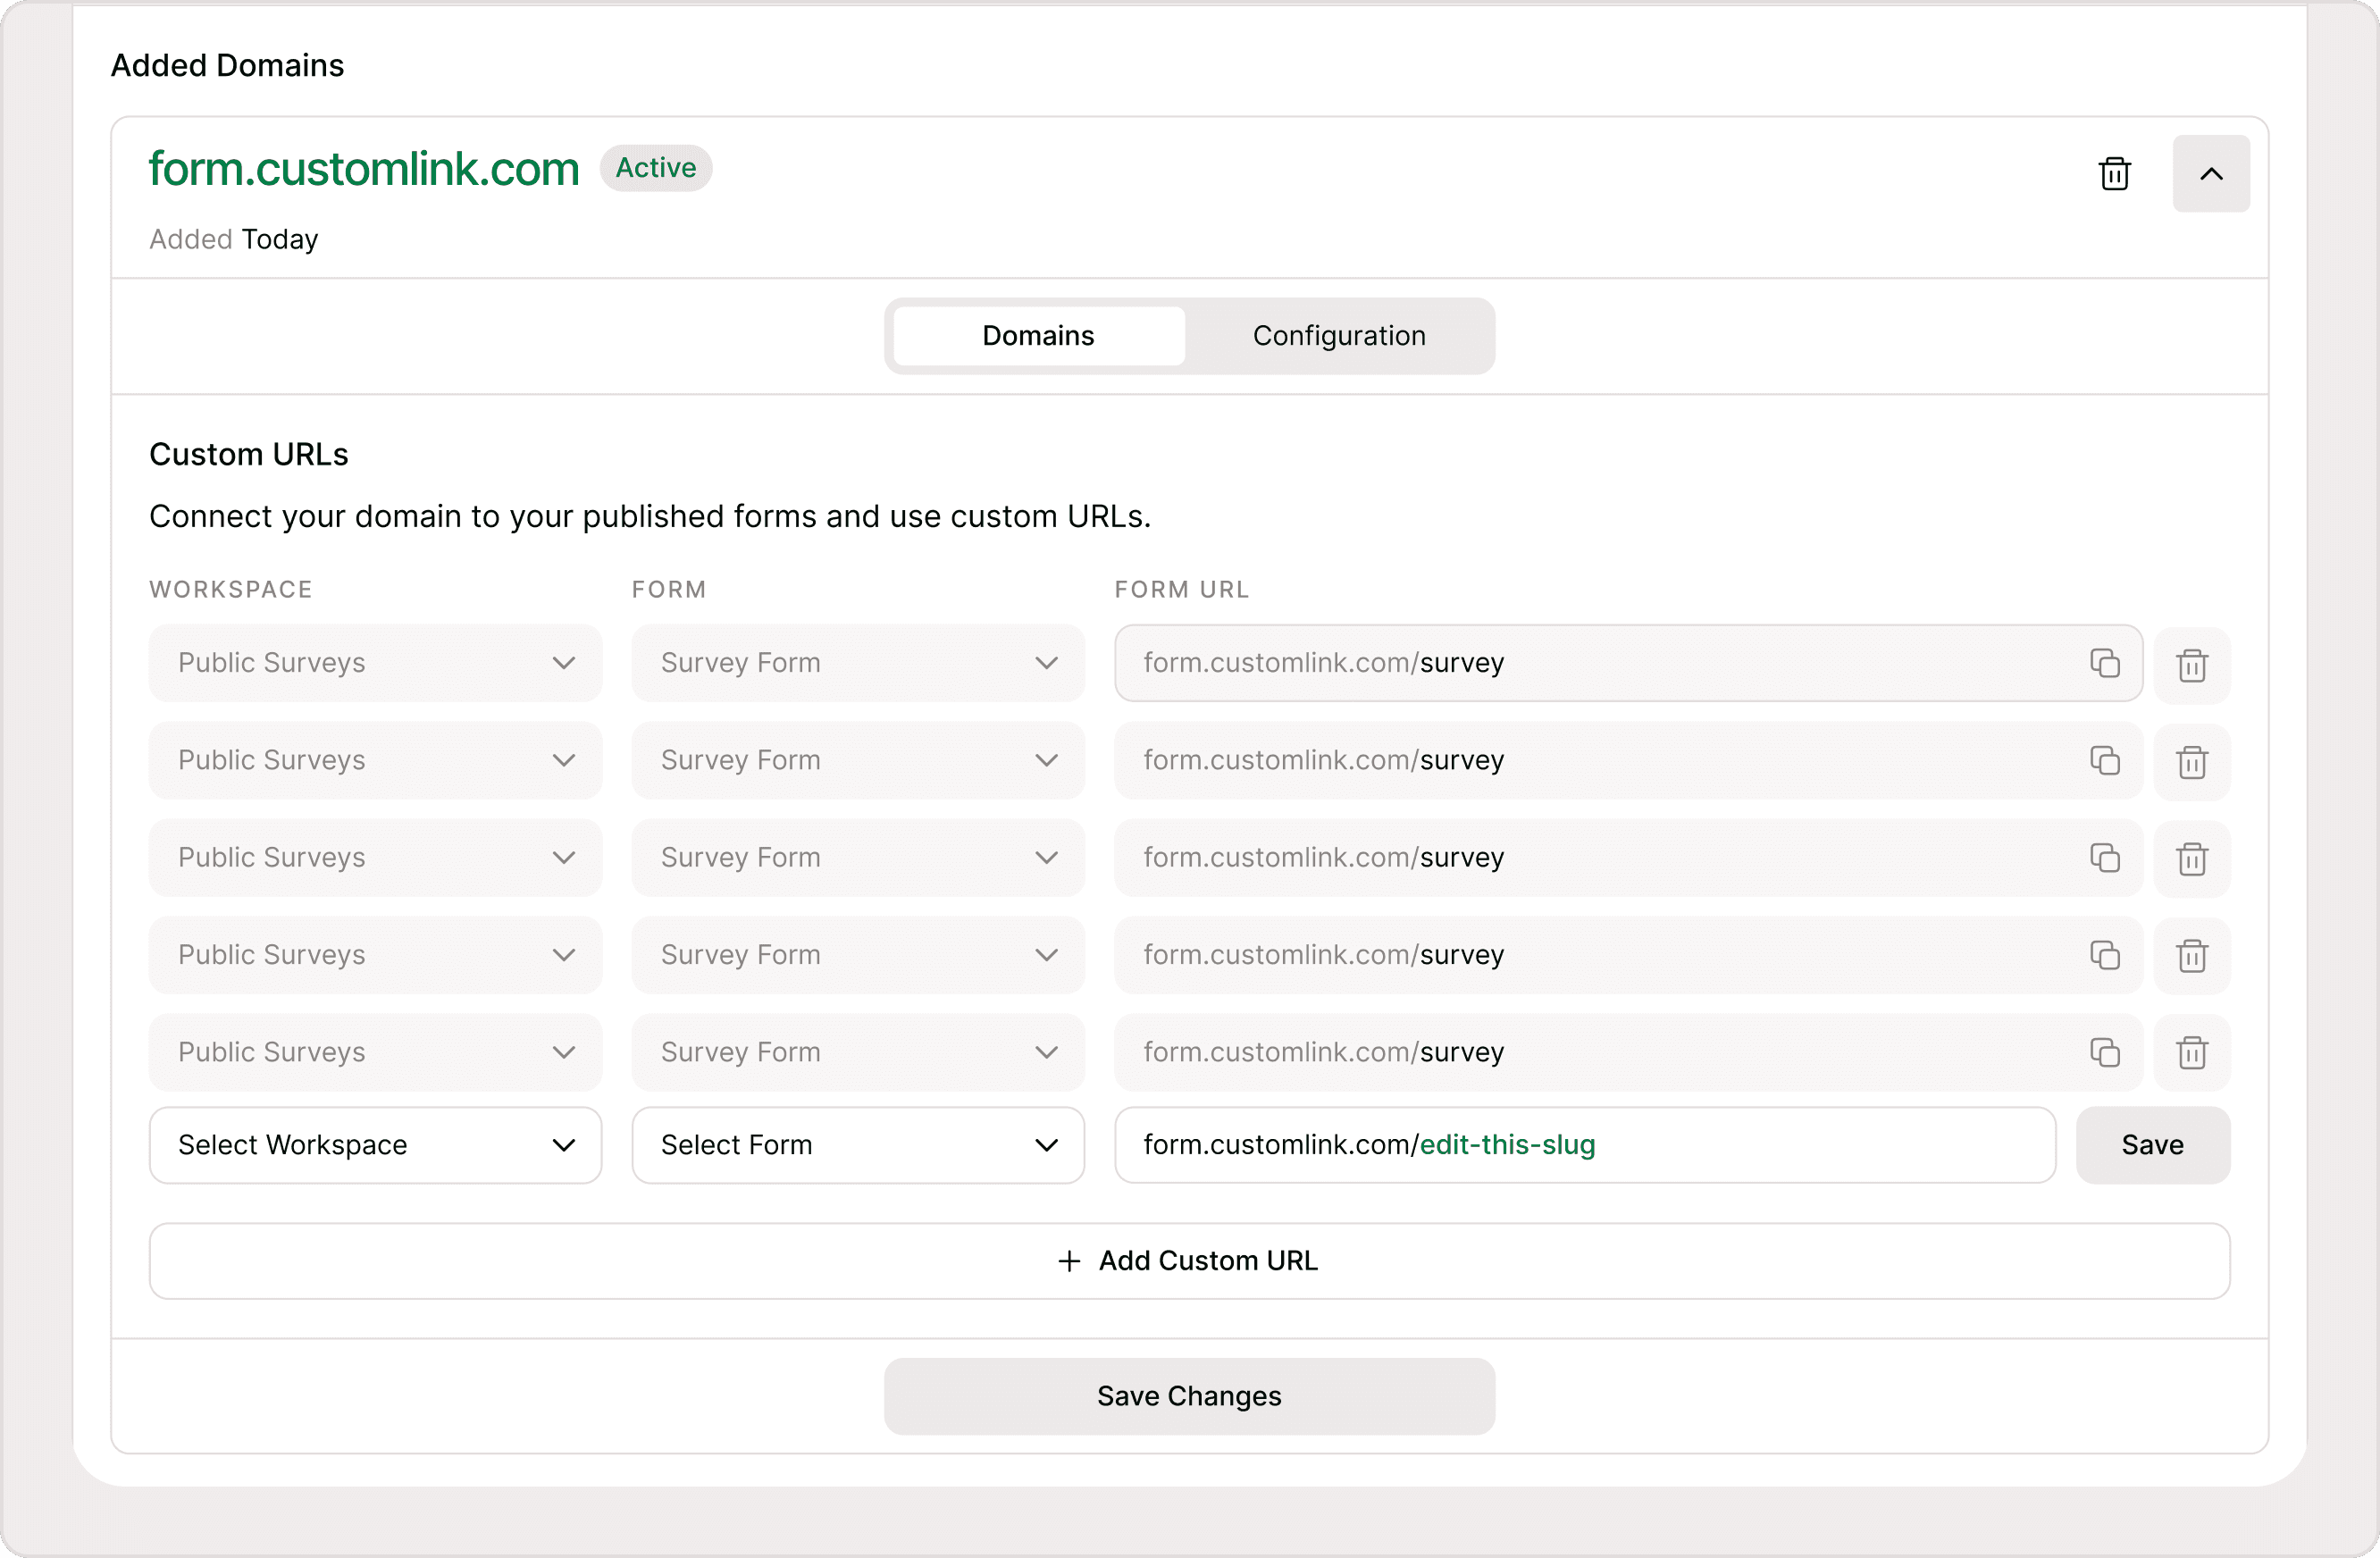
Creating Custom Form URLs
After your domain becomes Active, you can start creating custom URLs for your forms.
Steps:
Expand your domain from the list
Go to the Domains tab
Click + Add Custom URL
Select a Workspace
Select a Form
Edit the form URL slug
Click Save
Click Save Changes
This allows you to map specific forms to clean, structured URLs under your domain.
You can create multiple URLs for different forms and manage them in one place.
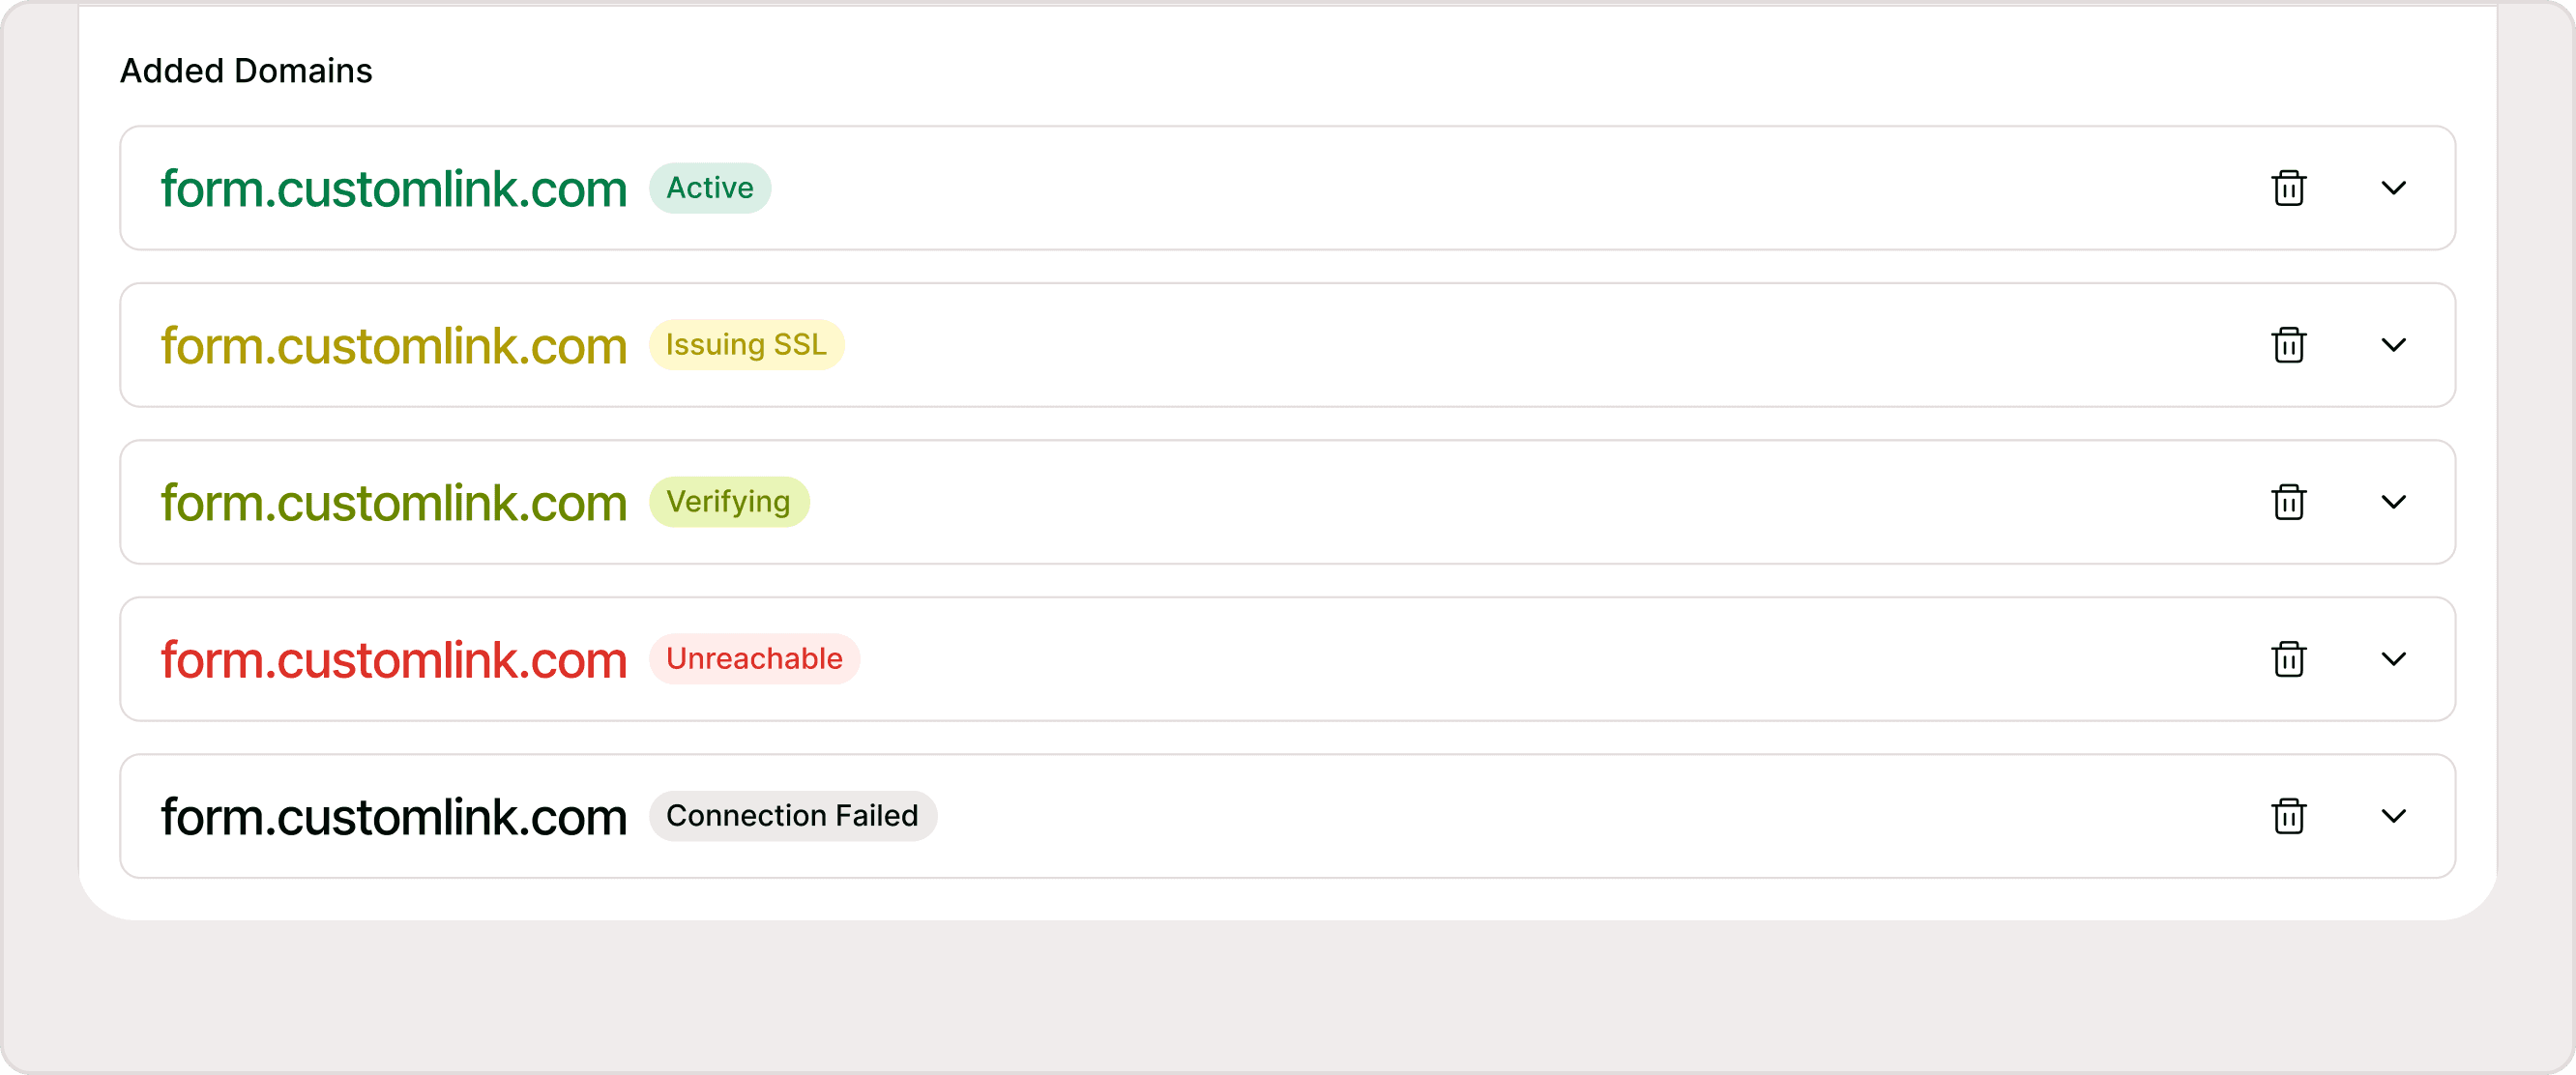
Domain Status
After verification starts, your domain will display a status in the Added Domains section. This status helps you understand whether your domain is connected, still processing, or needs attention.
Status labels explained:
Verifying → DNS records are being checked. This may take a few minutes to a few hours
Active → Domain is connected and ready to use
Issuing SSL → Secure certificate is being generated
Unreachable → DNS records are missing or incorrect
Connection Failed → Verification did not succeed and needs retry
If your domain is not Active, review your DNS configuration and retry verification.
Why use Custom Domains?
Using a custom domain improves both how your forms look and how users interact with them.
When respondents see a familiar domain, they are more likely to trust the form and complete it. This is particularly important for customer-facing forms, campaigns, and sensitive data collection.
Custom domains also allow you to standardize how forms are shared across teams and use consistent naming conventions for different use cases such as feedback, applications, or registrations.
In addition, they make your links easier to remember, reuse, and manage across multiple platforms.
Where Custom Domains are Used
Custom domains are used across different sharing scenarios.
You can use them when:
Sharing forms externally with users or customers
Sending links through email campaigns
Embedding forms into your website with consistent branding
Running marketing or product workflows
They also work alongside the Customize Shareable Link feature, where you can select your domain and define the final URL before sharing.
Default Link vs Custom Domain
Even when a custom domain is set up, the default Kiwiform link will continue to work.
The default link is useful for:
Embedding forms in platforms like Notion, Medium, or WordPress
Internal sharing and testing
Backup access if needed
Custom domains are primarily used when you want a branded and external-facing experience.
When to Use Custom Domains
Custom domains are most useful when:
You want to present forms as part of your brand
You are collecting responses from external audiences
You are running campaigns or structured workflows
You need consistent and professional URLs
For quick sharing or internal use, the default link remains effective.
Best Practices for Custom Domains
To ensure a smooth setup and consistent usage:
Use a subdomain (for example, forms.yourdomain.com) instead of your root domain
Keep URLs short, readable, and meaningful
Maintain consistent naming conventions across forms
Verify DNS configuration carefully before use
Use one domain across related workflows for consistency
Summary
Custom domains in Kiwiform allow you to create branded, professional form URLs by connecting your own domain and mapping forms to custom links. This guide covered how to add a domain, configure DNS records, verify connection status, and manage custom URLs across workspaces. It also explained how domains behave alongside default links, where they are used, and how to maintain consistency with best practices. By using custom domains, you can improve trust, create a seamless brand experience, and manage form sharing more effectively across different use cases.